Inbound Calls
FrontStage can fully replace making calls with your telephone terminal. Actually, physical terminals are used rather exceptionally. The call bar, current call information and current call editor portlets give agents, in addition to more convenient control of the extension from the computer, more options that are otherwise not possible. This section describes all options for making calls from FrontStage.
Note
FrontStage is richly customizable, so the actual form in which you will work with calls may be slightly different than the illustrations used.
Conditions
Ready status
You can use the agent login button to control your current status. You will usually find statuses here for most call center agent activities – those when you are unavailable for handling calls (“Lunch”, “Pause”, “Training”, etc.), and also the ready statuses (usually named “Ready”).
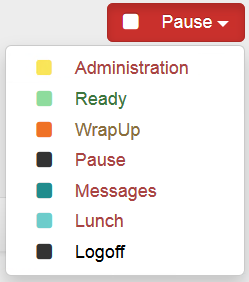
The specific name of a ready status may differ in your FrontStage. In addition, there may be multiple ready or ready states. For example, “Ready” may be for calls, if the status is “Email”, you do not receive calls and you work on emails. For these reasons, we will use the term ready status to refer to all “working” statuses.
Distribution conditions
Certain distribution conditions need to be met in order for you to be able to handle inbound or outbound calls.
The moment from which FrontStage looks for a suitable agent to handle a call (but also a message or chat) is called distribution. Distribution conditions can be very comprehensive, but the basic ones include those that you as an agent:
are in a ready status
have appropriate project skills
have appropriate language proficiency
Caution
While it is possible for agents to manage their own involvement in projects and languages, this option is frequently reserved just for the supervisor.
Inbound Calls
As soon as you switch to a ready status, calls may start coming to you. If you meet the call distribution conditions or have been selected by means of direct agent selection or the like, the telephone will ring and FrontStage will offer you the option to answer the call.
The following sections describe the various work options both before and during an inbound call.
Receiving a call
When a call is ringing at your workplace, you can check the call information such as the number, project, and campaign before answering the call.
You can answer the call in any way – on your terminal, headset, or using the FrontStage user interface.
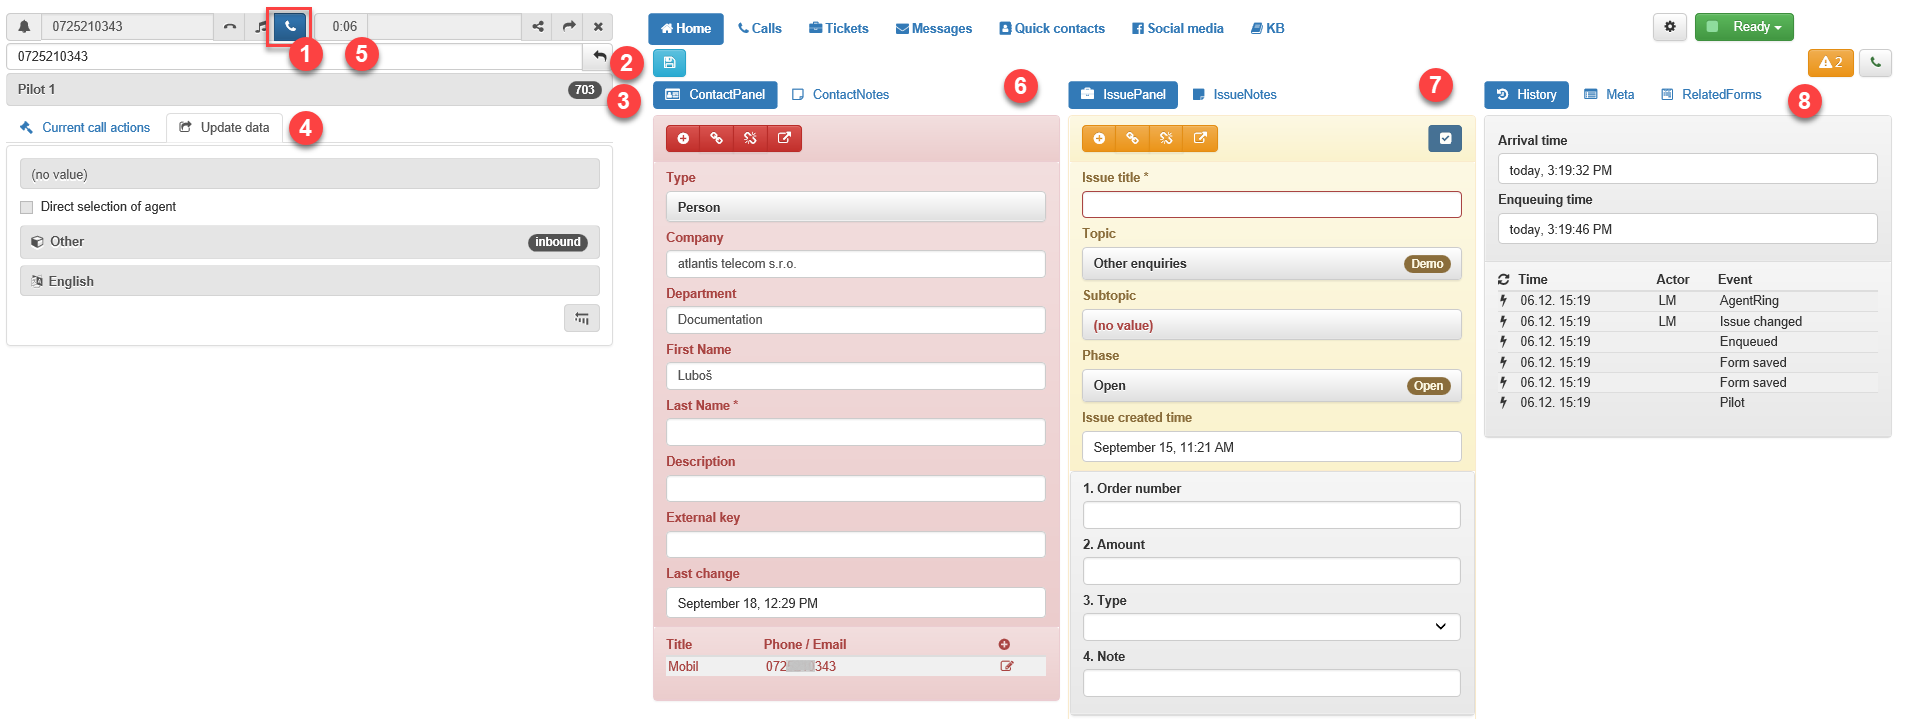
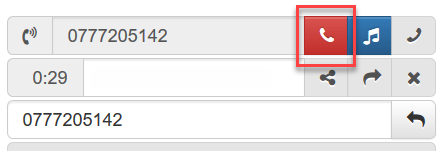
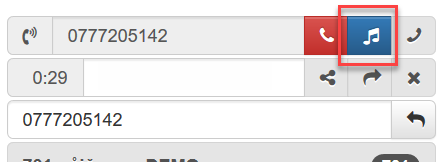
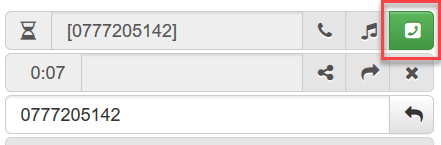
[1] Receive or, if you have the relevant rights, reject a call .
[2] You can also schedule a callback if you cannot receive the call.
[3] Incoming call pilot name and number.
[4] This tab allows you to view call metadata. You can edit the information for the current call and press Change data, save and re-queue to transfer the call (see Project transfer (between agents)).
[5] Time elapsed since the first ring.
After receiving the call, you may also see additional information on the screen – the contact and contact notes [6], issue and issue notes [7], history, metadata and forms [8]
Ringing at the agent is usually set to a limited time (typically 20 seconds). After this limit, it is marked as missed for the agent. FrontStage will also attempt to distribute the call to another matching agent. If no such agent is found, the call will continue to ring at your workplace.
Note
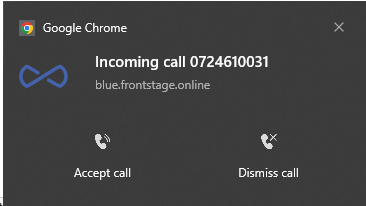
A pop-up window can also alert you to an inbound call, which can be useful when you’re in another app. See more. Notifications.
Terminating a call
To terminate your current call, press the relevant button in FrontStage or on the telephone terminal.
Entering info
When the call ends, a status usually referred to as “Completing info”, “Finishing” or the like is automatically set for, let’s say, 40 seconds (this time can be set individually for specific projects).
This status gives the agent time to complete and finish call handling activities (entering information in forms, external systems, etc.), then it usually automatically switches to a ready status.
Tip
If this status needs to be extended or shortened, you can set it manually by supervisor in the administration.
Put on hold to wait
During a call, you may need to temporarily interrupt the conversation, discuss something with a colleague, etc. In this case, you can put the call on hold, in which case the caller will hear pre-recorded music.
When you want to return to the caller, the music playback will end and you can resume the conversation.
Call transfer variants
There are more ways how to transfer calls.
Project transfer – To transfer a call to fellow agents (internally), you can use a project transfer. For example, if a customer called a wrong project, chose a wrong language, etc., the agent changes the call metadata and returns it to the queue. FrontStage will try to find another matching agent. Checking direct will transfer the call to a specific agent.
Consultation transfer – To transfer a call to an internal or even external number that you want to talk to before you transfer the customer to it, use Consultation transfer.
Transfer without consultation – It is possible to directly transfer the caller to an internal or external number using transfer without consultation.
Transfer on telephone terminal – Such a transfer is possible, but it is carried out by means of a telephone exchange beyond FrontStage’s control. This transfer does not appear in the statistics, the recording cannot be matched with the call etc. From FrontStage’s point of view, such a call will be terminated.
Project transfer (between agents)
Project transfer is the preferred, most systematic method. For example, if a customer calls a wrong project, choses a wrong language, etc., the agent changes the call metadata and returns it to the queue. FrontStage will try to find another matching agent. However, it can transfer the call to a particular fellow agent.
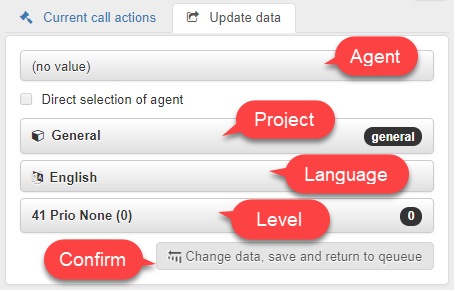
You can do this on the Change data tab where you can perform the following actions with the call:
Transfer to another project and/or language,
Distribute to a preferred agent by selecting the agent in the drop-down list, or
Distribute the call directly to a specific agent by checking the Direct agent selection option.
Confirm your selection by pressing the Change data, save and re-queue button.
Transfering a call with consultation (assistance)
See also
This type of transfer is also known as assisted transfer, with intermediate step or two-step transfer.
To transfer to an internal or even external number that you want to talk to before you transfer the customer to it, use the transfer with consultation. The customer will hear music while you consult the person at the number to which the call is to be transferred.
During the current call, enter the phone number to which you want to transfer the call and click on
 (dial a second call and start transferring).
Now you can talk to the person you want to transfer the caller to, and the current caller will hear music in the meantime. You can discuss anything – the callers can only hear the music.
If the other person agrees to accept the call transfer, click on
 (transfer). The call will be transferred. You cannot resume your conversation with the caller anymore.
If the other person does not want to accept the transfer or does not answer, click on
 (return to the original call) and you can resume talking to the caller.
Transfer without (direct) consultation
See also
This type of transfer is also known as unassisted transfer or one-step trasnfer.
It is possible to transfer the caller directly to an internal or external number by means of transfer without consultation.
During the current call, enter the phone number to which the call is to be transferred and click on
(transfer without consultation).
The call will be transferred without the possibility of your further intervention, whether or not the specified recipient accepts the transferred call.
Scheduling a callback
During a call, you can schedule a callback; for example, when the caller does not have time to talk now but you agree on a later point of time. This option can also be used if you cannot deal with the ringing call now and you do not want to forget it, and so you schedule a callback.
A callback is generated from an inbound call analogously as from an outbound call:
The current number is pre-filled in the second line of the Call bar.

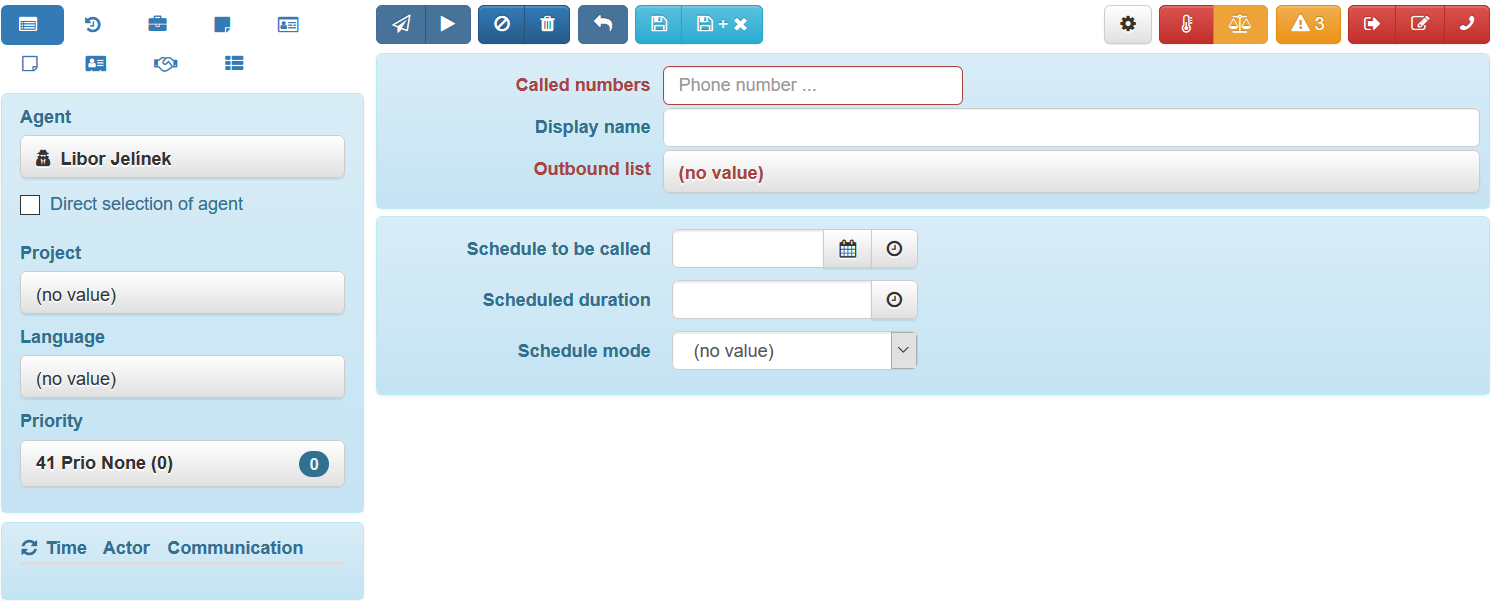
Click on the Share icon to open the ordinary call editor in which the following data is pre-filled:
Called party’s number (you can change it)
You as the Agent for this call (you can choose a different team member)
The Direct agent selection option checkbox is checked (you can uncheck it)
It is up to you to
Chose the appropriate Outbound campaign
Set Schedule call for execution for the agreed time (for input method options please see the Calendar modes)
Optionally change the Call name under which you can better recall the reason for the call or any other properties of the future call
Settings
You can adjust the behavior of the call window, which will be effective only for your account. You can open the settings from the call editor, by clicking the “cog” button.

Important
The settings is not available by default. To use it, you have to have appropriate permissions.
Available settings
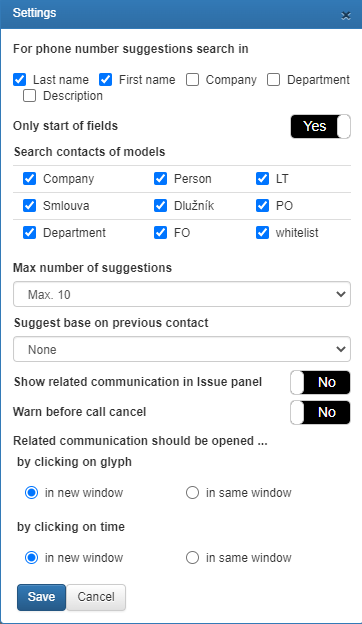
For phone number suggestions search in - call whisperer settings. When entering the phone number, yopu don’t have to insert the whole number out of the memory, but you can write just a part of it or the person’s name, company etc. The data are taken from saved contacts. The whisperer’s output according to:
First Name
Last Name
Company
Department
Description
Only start of fields - if OFF, text inserted into the whisperer will be looked up also in the middle of the text info (like firstname, surname etc. - see setting choices above). If ON, the text info will be always compared from the beginning.
Search contacts of models - second part contains Person and Company options by default (the number of models depends on your instalation), where you can choose, whether the whisperer should offer you these types of contacts or not.
Max number of suggestions - maximal amount of whispered records
Suggest base on previous contact - if ON, contacts from previous communication are taken into account. For every possible option here, time span is set to 7 days. For example: if you had saved some draft mail 5 days ago with particular email address and that address is also saved as a contact and you have enabled drafts in this settings and you will use the whisperer at this time, the particular email address will be whispered with priority. This settings can also be deactivated.
Show related communication in Issue panel - subtab Issue will contain the communication history
Warn before call cancel - prompt before cancel