Outbound Calls
FrontStage can fully replace making calls with your telephone terminal. Actually, physical terminals are used rather exceptionally. The call bar, current call information and current call editor portlets give agents, in addition to more convenient control of the extension from the computer, more options that are otherwise not possible. This section describes all options for making calls from FrontStage.
Note
FrontStage is richly customizable, so the actual form in which you will work with calls may be slightly different than the illustrations used.
Outbound call types
Outbound calls are distinguished in FrontStage according to whether they are scheduled for a campaign – these are referred to as project calls, or not related to any campaign - in which case they are considered private calls.
Outbound calls are normally scheduled for a particular time. If you need/want to call within a campaign in an unscheduled manner, then you make a adhoc project call.
Note
The reason why when you make a call within a campaign it is not referred to as a “campaign call” but a “project call” is because each campaign has a specific project set up. This allows campaign calls to be distributed to appropriate agents based on their project skills.
How to make a outbound call
Options how to make an outbound call.
Schedule outbound call (project call) – Schedule a call for a specific time either for yourself or for any of your agents who has the appropriate skills and language proficiency. This is the recommended way to do it; refer to Procedure to schedule a call below.
Schedule a callback (project call) – An identical procedure as scheduling an outbound call. This option is available upon clicking from the call bar during a call.
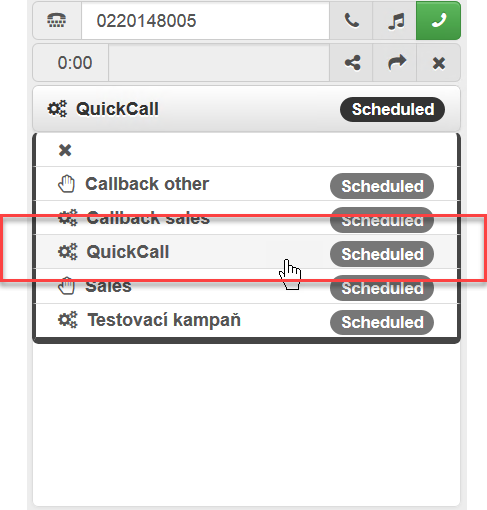
Enter number manually in the call bar with outbound campaign selection (adhoc project call) – The call is related to the selected campaign but for whatever reason I need/want to make the call immediately (adhoc).
Enter number manually in the call bar without selecting an outbound campaign (private call) – The call is not related to any campaign since no campaign has been selected. FrontStage can be set to log private calls.

Dial number on telephone terminal – Such a call cannot be registered in FrontStage, and so it will not be recorded and it will not be visible in any statistics, reports etc.
Schedulling a outbound call
You can schedule a call for a specific time either to yourself or to any of your agents who have relevant skills and language proficiency using the Outbound call link on the agent’s main page.
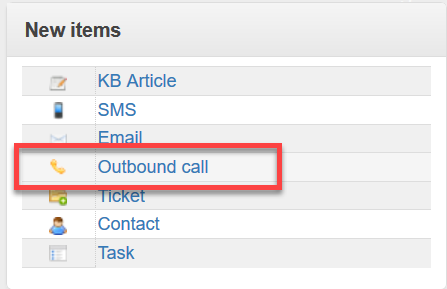
The link opens the outbound call editor.
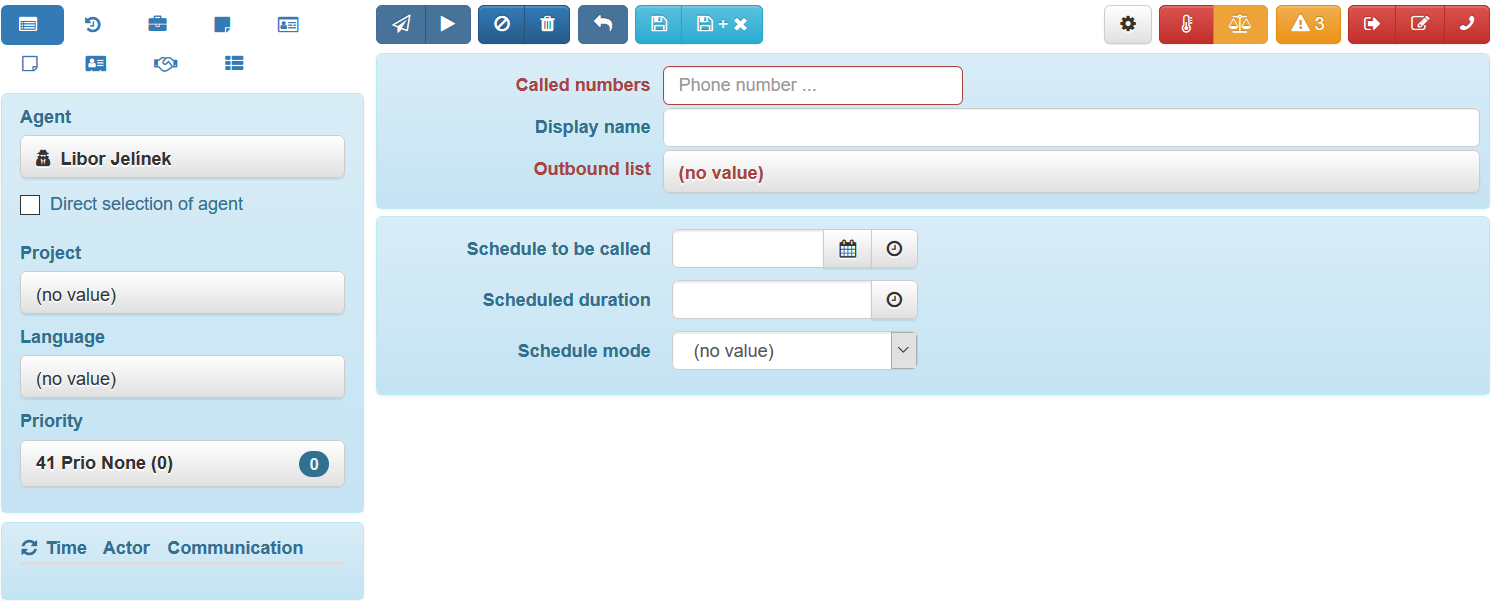
Call editor
The call editor is divided into tabs on the left, action buttons at the top and the main window section.
Tabs on the left
There are several tabs on the left side: for basic call metadata, history (this one is empty just after being created), issue and issue notes, contact and contact notes.
Note
You may see fewer or more tabs or have them in a different order depending on how your FrontStage installation is set up.
Info tab
The most important one is the first tab that is used to set the basic call metadata.
Field |
Description |
|---|---|
Agent tab |
A drop-down list used to select a preferred from agents grouped by teams. |
Direct agent selection tab |
Direct agent selection sets the call to be distributed solely and only to the selected agent. If the agent is not in the ready status at the time for which the call is scheduled, the call is not distributed any further and wais for the agent to become ready again. |
Project |
Required project skills of the agent who is to make the call. |
Language tab |
The required language proficiency of the agent who is to make the call. |
Priority tab |
If the defined levels are usable as a priority, this drop-down list appears. You can use it to determine the importance if you have many outbound calls. |
Main window section
The greatest part of the editor window is occupied by the main call-related section with the following fields.
Field |
Description |
|---|---|
Caller number |
The called party’s number. Existing and recently used numbers may be offered while you are entering the number. 
|
Call name |
You can choose a name that describes the purpose of the call, etc. |
Outbound campaign |
The call must be a project call; here you can choose a campaign from a drop-down list. |
Schedule call for execution |
Together with the Scheduling mode it determines when the call should be made. If you do not complete this field, it means that the call should be made immediately. |
Scheduled duration |
Indicative estimated call duration. |
Scheduling mode |
Together with Schedule call for execution it determines when the call should be made. |
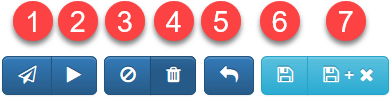
Action buttons
The opened outbound call editor now offers the below action buttons.
Button |
Description |
|---|---|
Schedule for myself [1] |
Sets direct agent selection for you and closes the editor. |
Schedule call for execution [2] |
Queues the call and closes the editor. The call will be distributed according to common rules. |
Unschedule call [3] |
The call status changes to “Neglected”. It will not be editable through the call editor until it returns to the “Paused” status. It is used when you do not want to or cannot answer the call at the moment and may return to it later. |
Cancel call [4] |
The call status changes to “Canceled”. It can never be edited in the call editor again. The call will remain preserved as it is. This is for situations when you initiated a call by mistake. |
Call again [5] |
Creates a copy of the call with identical metadata (phone number, agent, project, campaign) and opens it in another editor window. |
Save changes [6] |
Saves changes and leaves the editor window open. |
Save changes and close window [7] |
Saves changes and closes the editor window. |
Scheduling a callback
Important
You can make the option to create callbacks available directly to the customer – either in the IVR script (“If you want us to call you later, press 4.”) or from a form on your website (using the Website module).
Alternatively, FrontStage creates a callback when the customer cannot reach anyone (no free agent, etc.).
You can schedule an outbound call with a single click in the Call bar during dialing or ongoing call. For example, if the called party does not currently have time to talk but agrees that you can call e.g. tomorrow morning.
The current number is pre-filled in the second line of the Call bar.

Click on the Share icon to open the ordinary call editor in which the following data is pre-filled:
Called party’s number (you can change it)
You as the Agent for this call (you can choose a different team member)
The Direct agent selection option checkbox is checked (you can uncheck it)
It is up to you to
Chose the appropriate Outbound campaign
Set Schedule call for execution for the agreed time (for input method options please see the Calendar modes)
Optionally change the Call name under which you can better recall the reason for the call or any other properties of the future call
Agent offered
If you are ready, you have the appropriate skills, proficiency, you have been selected by means of direct agent selection etc., the outbound call is first offered to you. You can look at the scheduled call information such as the number to be called, project, campaign, and decide whether you want to make the call or put it back in the queue to be offered to another agent. The call is not yet in progress during this offer phase.

[1] Accept call. Only when the call is accepted does the dialing actually begin.
[2] Reject the call. If it is not a call with direct agent selection, the system looks for another suitable agent for the call.
[3] You can also schedule a callback while the call is being offered.
[4] If a call name has been entered, it will appear here.
[5] This tab allows you to view or change call metadata. When you have edited the data, press Change data, save and re-queue to allow the call to be distributed again.
[6] Time elapsed since the call was offered. The call keeps being offered indefinitely. Accept it when you are ready.
During the call offer phase, you will also see additional information on the screen – the contact and contact notes [7], issue and issue notes [8], history, metadata and forms [9].
Preview
If the preview phase is configured for a call, the call preview, including the corresponding data, is displayed after the offer is accepted. A call is not yet in progress during this phase. Depending on the configuration, the preview can be either time-limited or unlimited.

The agent can initiate a call using the red Answer button (on the right side of the call bar). The outbound call preview cannot be rejected (inactive buttons).
Dialling
If the preview phase has not been configured, the call immediately proceeds to the dialing phase after being offered. If the preview phase did take place, the call is started only now (without ringing at the agent). The left button on the call bar turns red, is enabled and can be used to hang up the call. At the same time, the usual ongoing call card is displayed below the call bar and call information.

Call Result
When answered by the called party, the conversation with the agent begins. During or after the call the agent can edit the call result.

The Call result drop-down list on the Result tab offers usually the following options:
Busy (call another time)
Not answering (call another time)
Wrong number, cannot be reached
Wrong person, call another time
Continue another time
Number changed
Cancel, do not call
Done
It is possible to set the reschedule time of the call for the options of “Call another time”, “Busy” and “Not answering”, or leave the rescheduling up to the set Outbound campaign parameters. The call result tab can be turned off in the administration, in which case the agent indicates nothing.
If the call ends before the call result is completed, the call waits for the result to be filled in for a pre-set time or without a limit.
When the necessary parameters have been entered, the agent clicks on Submit call result in the bottom right corner.
WHile in the “Completing info” status, no new calls are distributed to you.
Setting a call result for NoResult calls
For calls with no result (NoResult), you can click on the  icon next to the call result to open a window for its entry.
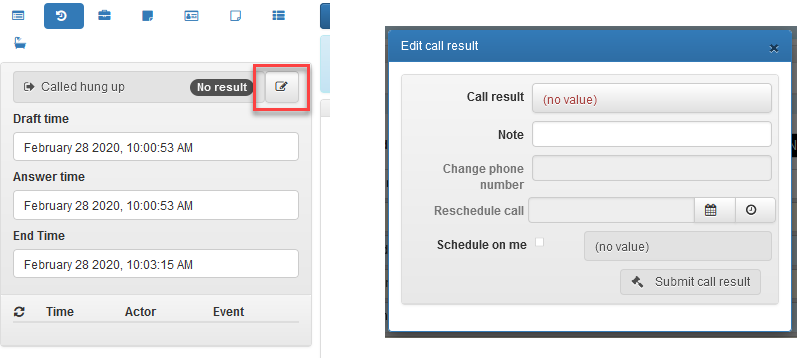
The additionally saved call result will have the same effect as if the agent had done it while the call was still active – e.g. call rescheduling, capacity planning check.
Entering info
In addition, switching the agent status to the PCP status, which is usually named “Completing forms”, “AfterCall”, “Wrap up” and so on, can be configured on the project level.
This status can have a timeout set, or it can last indefinitely until the change is made manually. In this status, calls are not distributed to the agent.

Voice record, TTS, bookmarks
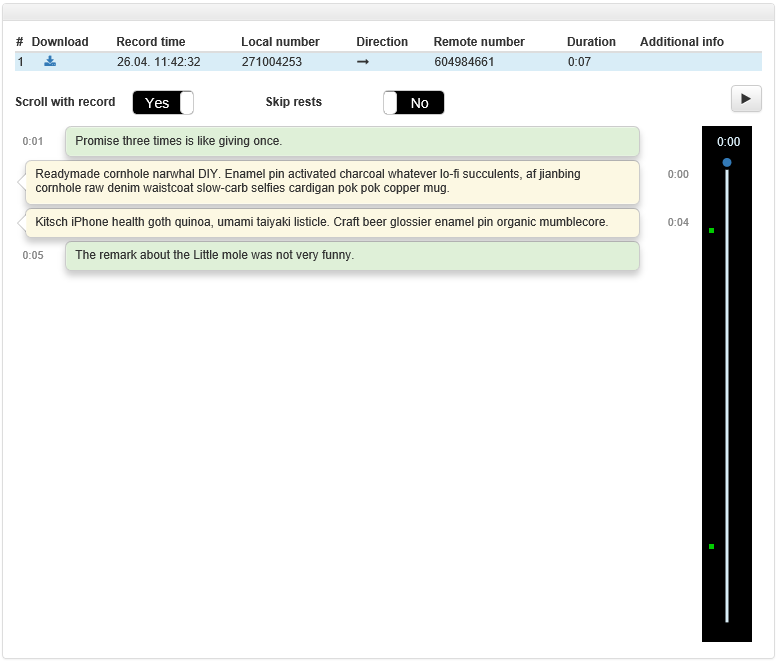
Simplified access to call recordings (playback and download), transcription and notes are made possible directly in FrontStage by inbound and outbound call editors. If a recording, its transcript of text (TTS), or notes is available, it will appear in the main part of the editor.
Use the vertical player to play the recording
The bubbles on the left show the counterparty’s text (call center client)
The bubbles on the right show the agent’s texts
The rounded buble displays notes inserted before the text to which they relate
See also
File recordings and their transcript to text (TTS) is handled by SmartRec. Frontstage access allowes you only to do the basic operations with recordings - listening, reading the transcript and notes.
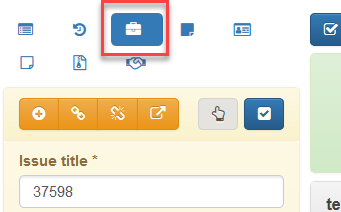
Associating with an issue
Note
Issues are an optional component of FrontStage; your contact center need not use this feature.
A call can be associated with an issue either
automatically – For example, when a call is received, a new issue is always created for it, or the latest open issue for the given recipient is associated, etc.
manually – The agent creates a new issue for the call, or associates it with an existing issue
In both cases, the controls by which you can create and associate calls with issues can (usually) be found on the third tab of the call editor. The tab options are described in Issues for agents.
See also
See more about Tickets.
Settings
Options available within the outbound calls settings are the same as for the inbound calls.