Messages
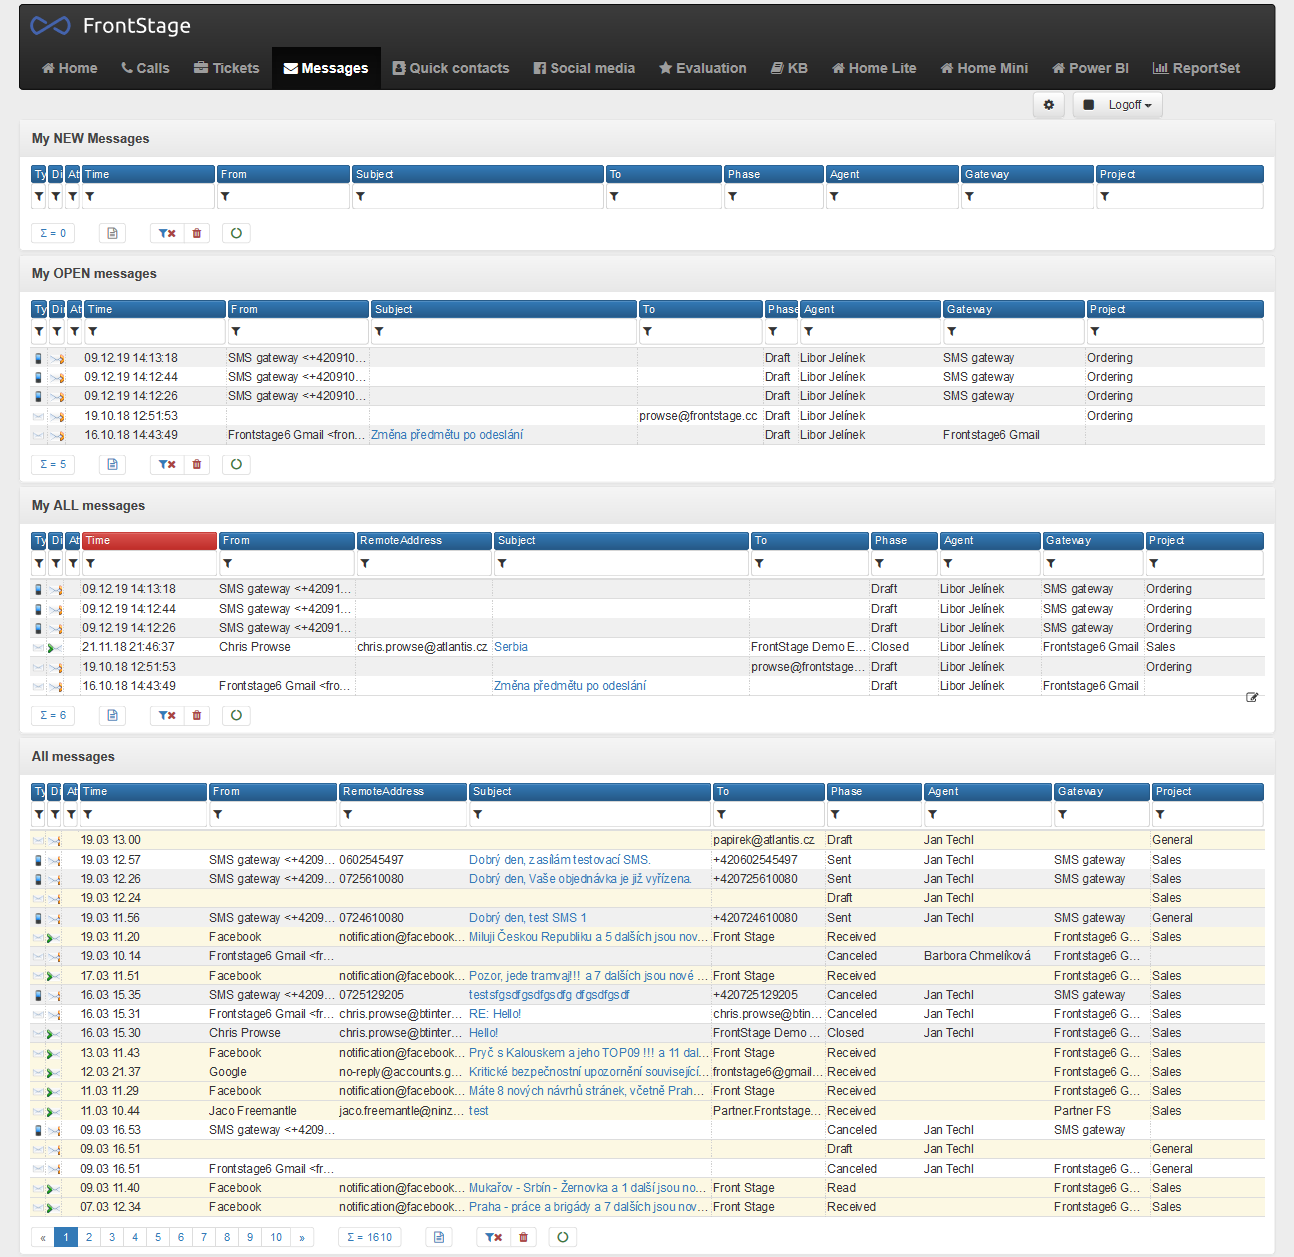
Agents use the Messages tab work with messages. It can be e-mails, short messages, fax messages or a combination of all these kinds of messages. The messages in the tab are usually divided into those for the logged-in agent (structured as New, Open, In progress, and All of their messages), and all messages received by the contact center.
Note
FrontStage is richly customizable, so the actual environment or interface layout in which you work with messages may be slightly different than the illustrations used.
Messages of any type are divided into inbound and outbound, or received and sent by the contact center. In this article, you will learn to do the following with outbound messages:
Create message – Create a message and select From, To, Copy, Blind copy, etc.
For inbound messages you will learn to
Change metadata (set project, priority and more), and in particular Offer to another agent.
Accept or return to queue. If a message has been accepted, you can Finish it, Reply, Reply all and Forward it.
Regardless of the message direction and status, you can:
If you use issues, you can Link it to an issue.
Open and view
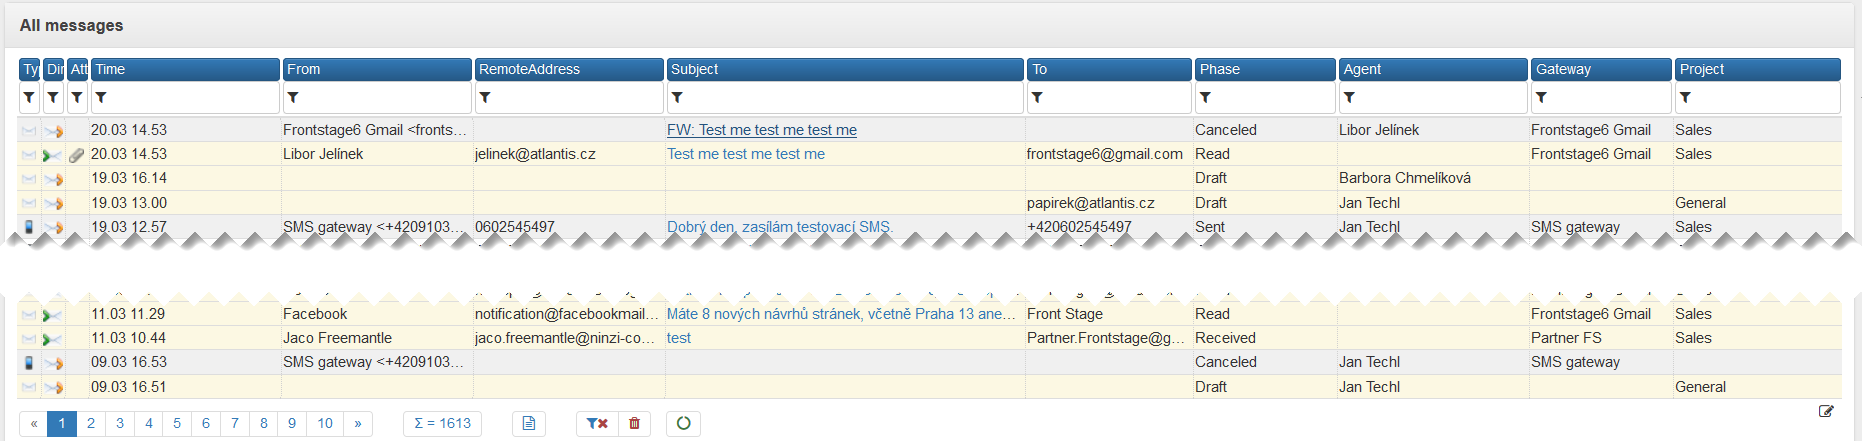
You can open a message that you are authorized to access from the list in two ways - by clicking on the message type icon (first column) or by clicking on the subject of the message.

You can also often see the message direction (inbound/outbound), phase, time, whether it has an attachment and other information. Inbound messages are sometimes shown separately, in another installations they may be shown together with the outbound ones.
Message editor
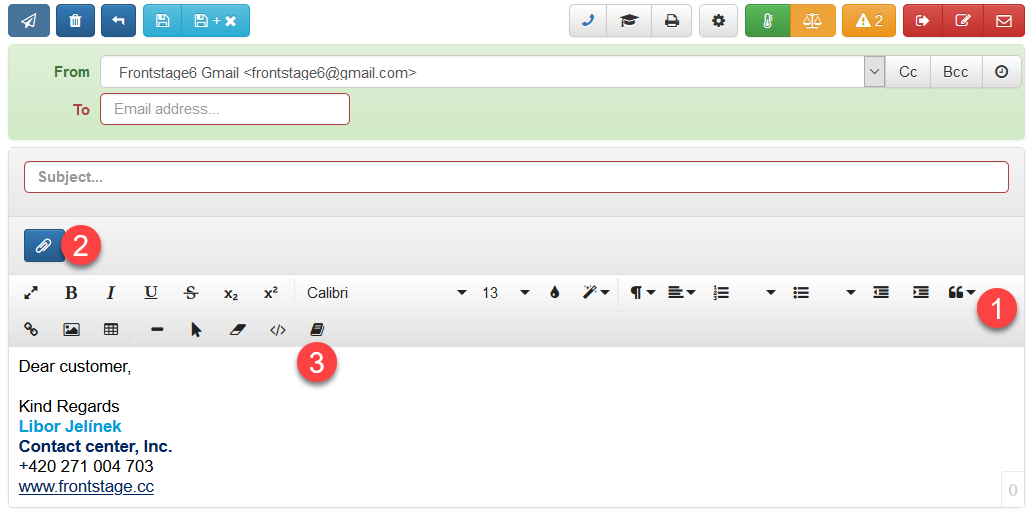
When opened, the message editor is divided into several sections:
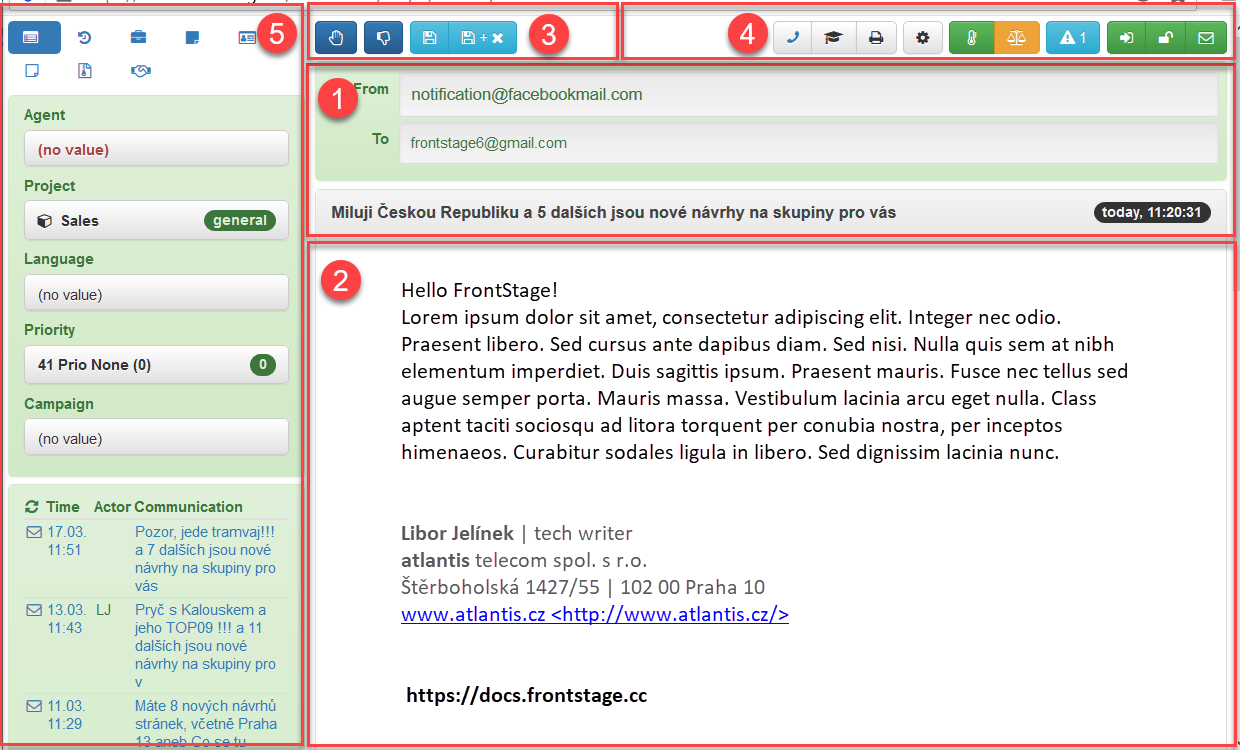
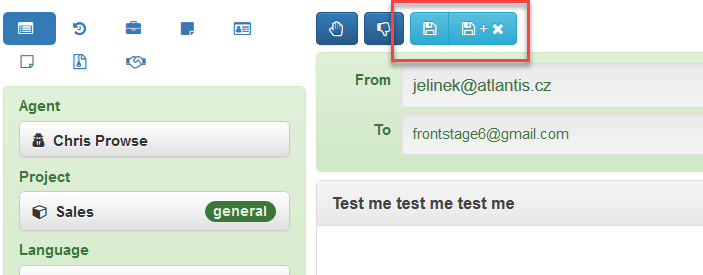
[1] Sender, recipient and subject of the message.
[2] Message body.
[3] Buttons for working with the message according to its status.
[4] Customizable section for buttons independent of message status such as Print, Message based call and so on.
[5] Tabs with details of the message (you can see a different number of tabs or tabs arranged in a different order):
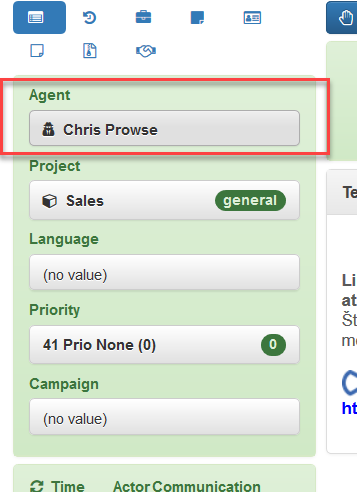
Basic information – The agent assigned to the message and their team, project, language, campaign.
History – The current status and phase of the message, all times related to the message origin and its passage through FrontStage
Issue and issue notes – If you are using issues, you will see issue details such as topic, subtopic, phase, creation time and, possibly, an attached form.
Contact and contact notes – If you use contacts, you will see the message contact information.
Outbound messages
Messages that you create and send are called outbound messages. Outbound messages also include your replies to inbound messages.
Create a message
It is often possible to create a message from the initial tab (not from the message tab!)

On the initial tab you will find a link or links related to a new message - e.g. SMS and e-mail:
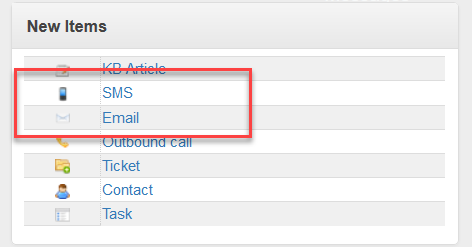
The newly opened window is the same as in Open and view existing messages.
Inbound messages
Inbound messages are all messages that arrive at the contact center. Messages are distributed to agents similarly to calls using a set of rules that allocate messages by language, project, etc. to agents with the appropriate proficiency and skills. The messages that you should be able to handle according to the rules are offered in the “My messages” lists - usually My new messages, My open messages, and All my messages.
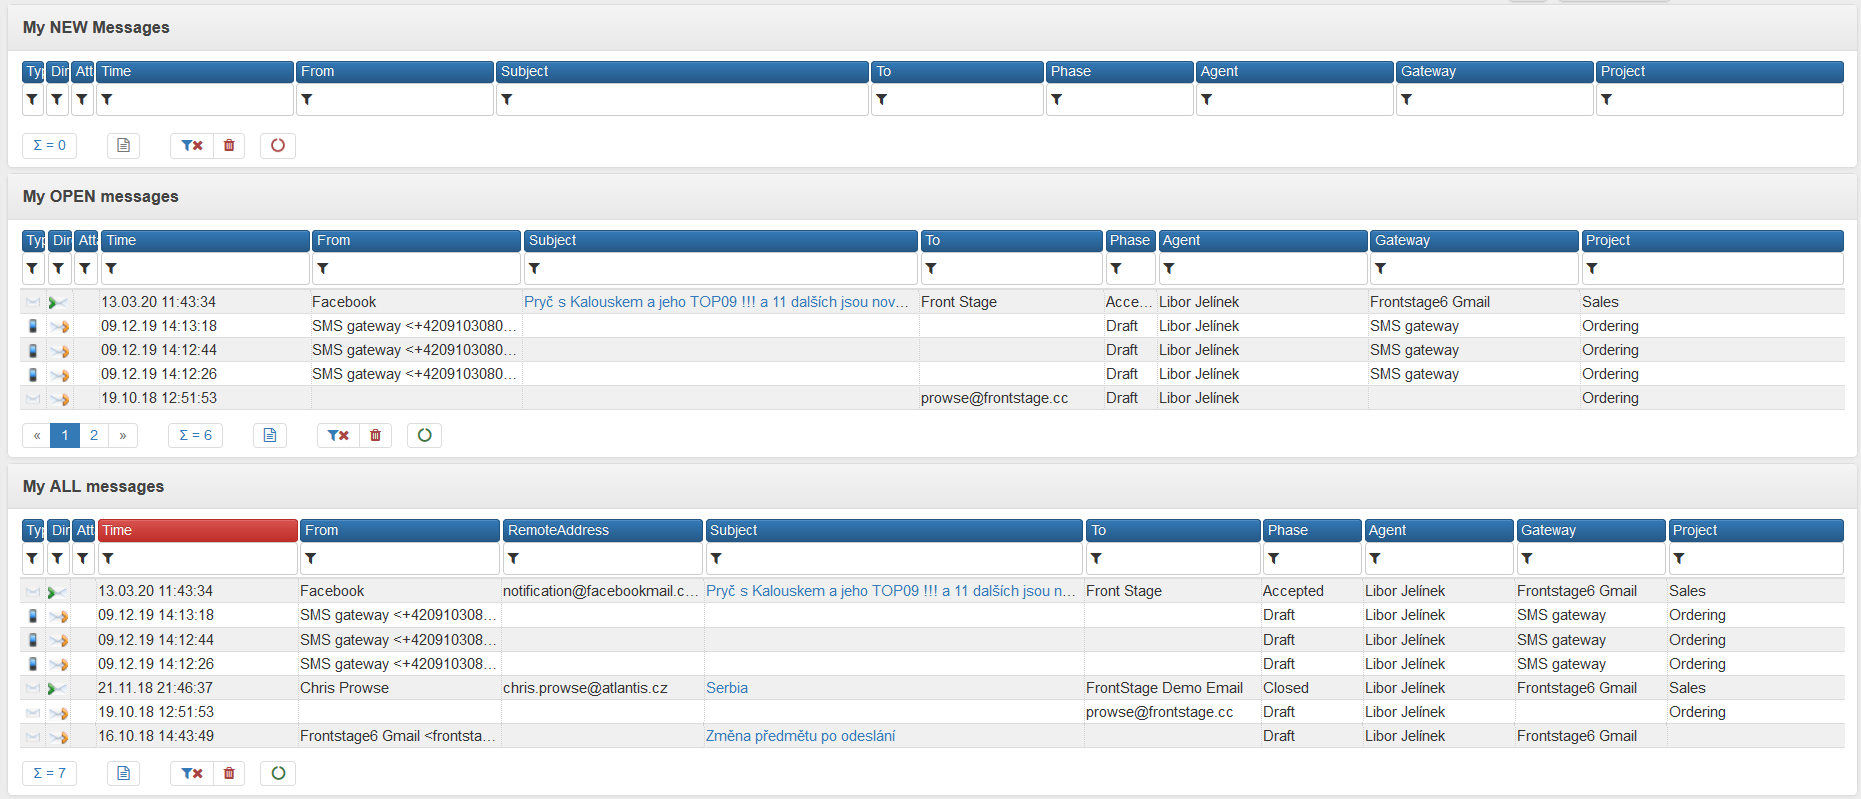
Messages from the entire contact center are often displayed. You can also receive any of these messages if you have finished handling yours. Alternatively, you can find the message history for various searches, etc.
In order to be able to handle a message, you must first accept it - take it as your own, be a problem/query solver for the message. Unlike calls, you can define in a setting that an agent to handle multiple messages in parallel. You can reply to, forward, or handle a received message. Handling does not necessarily mean answering. For example, you spoke to the inquiring person over the phone, it was an error, etc.
You can “offer” a missed message to another agent by changing the metadata, mark it as spam, or print it.
Change metadata
For messages as well as for calls, metadata is important - agent, project, message language, campaign. Based on this metadata, messages are distributed among individual agents. The offering process includes changing the recommended agent in the metadata. In the same way, you can change the language, for example, if badly recognized by the system etc. or, if relevant, edit other metadata.
You can change the metadata without accepting a message. The change will redistribute the message according to the new metadata.
Offer to another agent
If you want an agent other than you to handle the message, do not forward the message; instead, change the agent in the message metadata. The selected agent is then offered the message in his “My messages”.
See also
Do not confuse a message offer with Forward. Offering means that the message appears in the “My messages” section of the selected colleague’s or agents’s screen. Forwarding is intended rather for forwarding a message outside the contact center. When forwarding, metadata is lost and the message is actually a seemingly new inbound message.
Find and open the message you want to offer to another agent.
Set/change the agent on the first tab.
Save by clicking on Save or Save and close.
The message disappears from your screen and is offered to the selected agent.
Accept or return it to queue
If you want to deal with the message - reply, forward and handle, you must accept it. That way you indicate that you are going to deal with the message.

If you have accepted a message by mistake, you can return it to the distribution - it will disappear from your “My messages” section and the system will look for another agent to offer the message to.

Finish
One possibility after receiving a message is to handle it. This means that you have accommodated the request or otherwise handled the message.
If you do not use issues or there is no message associated with an issue, you will see only the button Finish.

If the message is associated with an issue, you will also see a button that you can use to Finish and close issue.

Reply, reply to all
You can reply to the message accepted - send a message to the sender, or reply to all - send a message to all (the sender and other persons in copy).

While replying, new buttons and options for changing the response will appear.
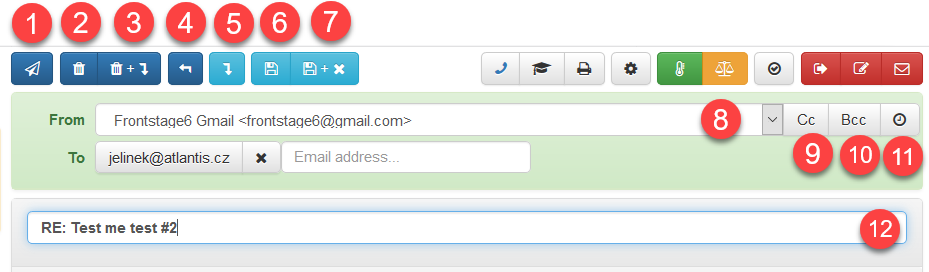
[1] Send.
[2] Cancel.
[3] Cancel and go to original message. Opens a window with the original message (to which you are replying).
[4] Return to queue.
[5] Go to the original message. Opens a window with the original message.
[6] Save changes. It does not send the message but saves it among drafts.
[7] Save changes and close window. Same as before, but the window is closed.
[8] Select sender.
[9] Displays a field for specifying copy recipients (Cc - carbon copy).
[10] Displays a field for entering blind copy recipients (Bcc - blind carbon copy).
[11] Schedule sending for later.
[12] Change subject.
The options available while typing depend on the type of message and FrontStage settings. When writing e-mails, you usually have a full set of formatting options available, such as bold, italic, font and size change, bullets ([1]), you can insert attachments ([2]), etc.
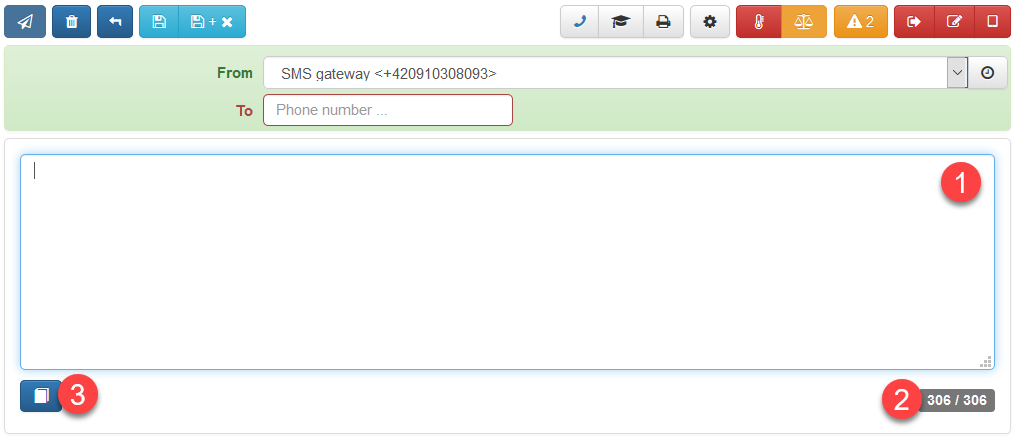
SMS messages are much easier - you can only use plain text without formatting ([1]), you cannot insert attachments, you are limited by the number of characters ([2]).
Both message types allow you to use templates - pre-defined message templates - which are usually prepared and maintained by the supervisor. For e-mails there is a template button among other formatting buttons ([3]), for SMS it is in the bottom left part of the screen ([3]).
Forward
See also
You may want to Offer to another agent. Offering means that the message appears in the “My messages” section of the selected colleague’s/agent’s screen. Forwarding is intended rather for forwarding a message outside the contact center.
Forward will cause the message to be forwarded as you know this feature from other mail clients.

Entering the sender, recipient(s), the writing environment and other options are same as for Reply, Reply all.
Common operations
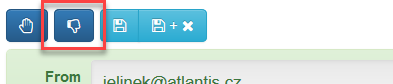
Mark as spam
When you receive a message that is unsolicited, harassing or otherwise irrelevant, mark it as spam. The button will mark it as such and close the window.
Important
It is not a protection against spam as such. The mail system protects against common spam and retains detected spam before FrontStage selects messages from the mailbox. However, you may still receive a number of inappropriate messages in the contact center - various newsletters, vulgar customers, etc.
By default, the button has no meaning, but you can decide that messages marked in this way will not appear in the statistics, will not be offered to anyone, etc. With this functionality, you rather mark e-mails that you do not want to deal with.
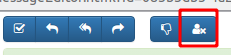
Block sender and mark as spam
This button will mark the communicaton as spam (same as the button above), but as an addition, it will prevent the sender from futher communication. Contact, under which has been the message sent (e-mail, phone number, etc.) will be “Blacklisted” and you will receive no futher communication from it.
Note
Your supervisor can check, whether the contact is blocked or not, in administration, section , where the discussed e-mail/phone number will be titled as “Spam” and list will be “Blacklist”
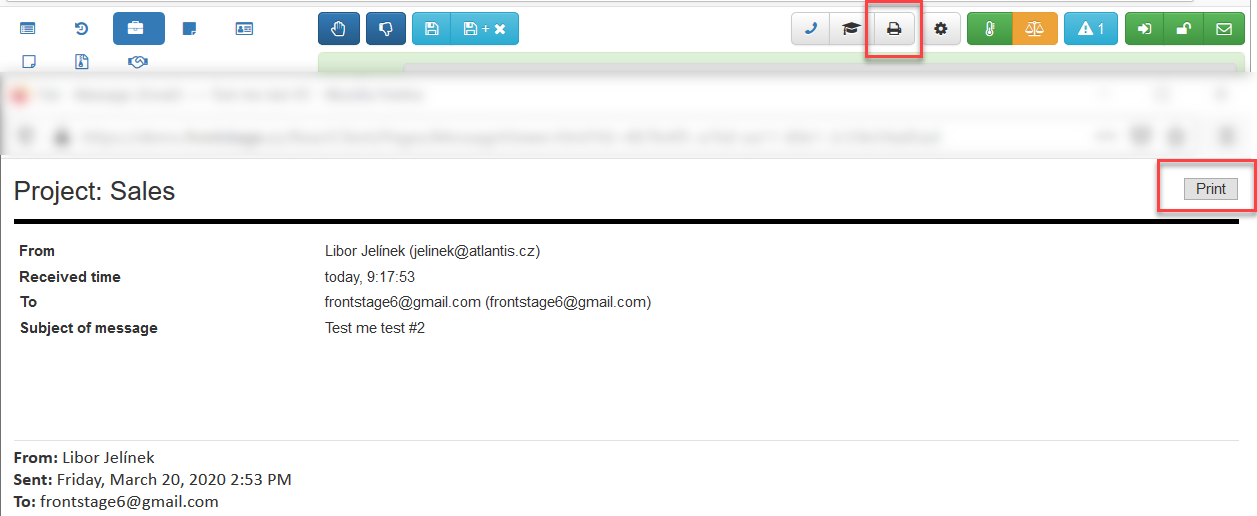
Print
Note
Message printing may be disabled for your FrontStage installation.
The “Print message” button is located on the right side of the message editor. The printing functionality will open the message in a separate window in a printable view, where you will find the actual print button.
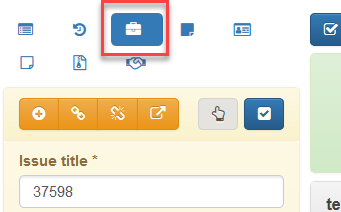
Associate with issue
Note
Issues are an optional component of FrontStage; your contact center need not use this feature.
A message can be linked to an issue
Automatically – For example, when a message is received, a new issue is always created for it, or the latest open issue is assigned for the given recipient, etc.
Manually – The agent creates a new issue for the message, or links it to an existing issue
In both cases, the controls by which you can create and associate messages with issues can (usually) be found on the third tab of the message editor. The tab options are described in Issues for agents.
See also
More info about issues can be found in a section Tickets.
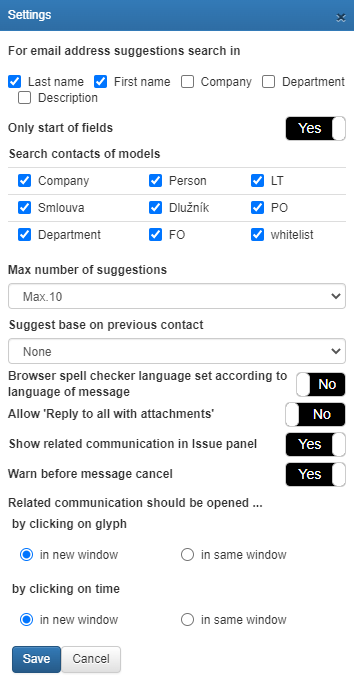
Settings
You can adjust the behavior of the message window, which will be effective only for your account. You can open the settings from the message editor, by clicking the “cog” button.

Important
The settings is not available by default. To use it, you have to have appropriate permissions.
Available settings
For email address suggestions search in - email whisperer settings. When entering the email address, you don’t have to write the whole address out of the memory, but just a part of it will do, alternatively receiver’s name or his employer’s name and so on. The data are taken from saved contacts. Whispering options according to:
First Name
Last Name
Company
Department
Description
Only start of fields - if OFF, text inserted into the whisperer will be looked up also in the middle of the text info (like firstname, surname etc. - see setting choices above). If ON, the text info will be always compared from the beginning.
Search contacts of models - second part contains Person and Company options by default (the number of models depends on your instalation), where you can choose, whether the whisperer should offer you these types of contacts or not.
Max number of suggestions - maximal amount of whispered records
Suggest base on previous contact - if ON, contacts from previous communication are taken into account. For every possible option here, time span is set to 7 days. For example: if you had saved some draft mail 5 days ago with particular email address and that address is also saved as a contact and you have enabled drafts in this settings and you will use the whisperer at this time, the particular email address will be whispered with priority. This settings can also be deactivated.
Browser spell checker language set according to language of message - dynamic spell checker during the email writing, language automatically detected
Allow “Reply to all with attachments” - if ON, inbound email form will display Reply to all with attachments extra button. It will be present only if inbound email has some attachments in it. When clicked, new outbound email will be created (all email addresses included) with originally attached file included.
Show related communication in Issue panel - subtab Issue will contain the communication history
Warn before message cancel - prompt before cancelation
Attachments
Received message can also have some attachments. These will be displayed in message header. All file types are allowed.
Note
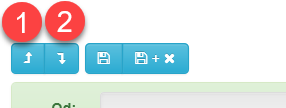
If more messages in the communication have some attachments and you would like to see the attachment from the previous message, you have to display the message (buttons 1 and 2), where the attachment was originally included.
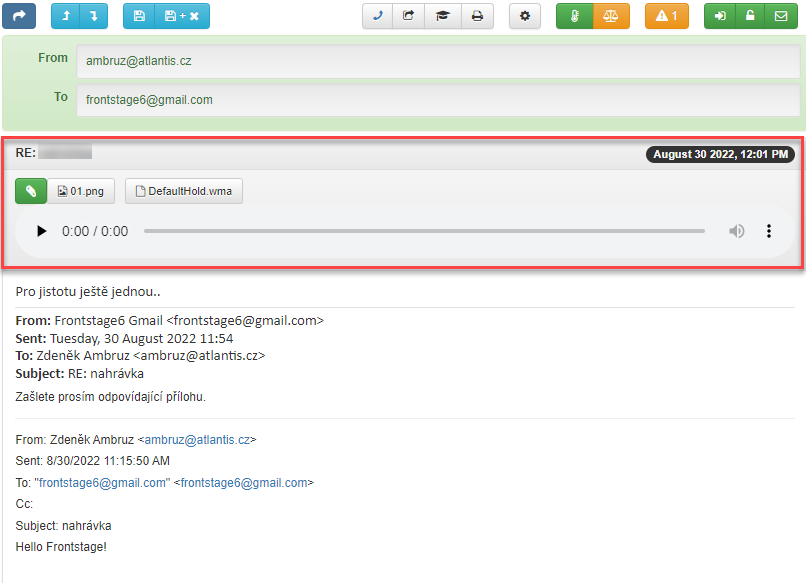
attachments can be downloaded one by one, by clicking on it’s title or as bulk, by clicking the green button Download all attachments. attachments can be then opened on your computer, with using programs dedicated to that.
If one of the attachments is an audio file, name of the file won’t by displayed, but instead a built-in audio player will appaer and you can play the file immediatelly.

In case you need to download the file anyway, open the menu in built-in player (see. the picture) and download the file. The same menu also allowes you to set the playback speed.
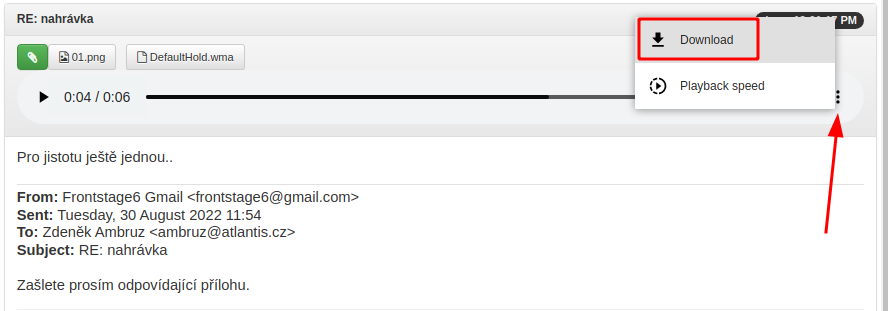
Attention
The built-in player will trigger only for the files, which will pass the condition set in- configuration parameter SoundPlayerMimeType. Rest of the files will be presented the standrd way.