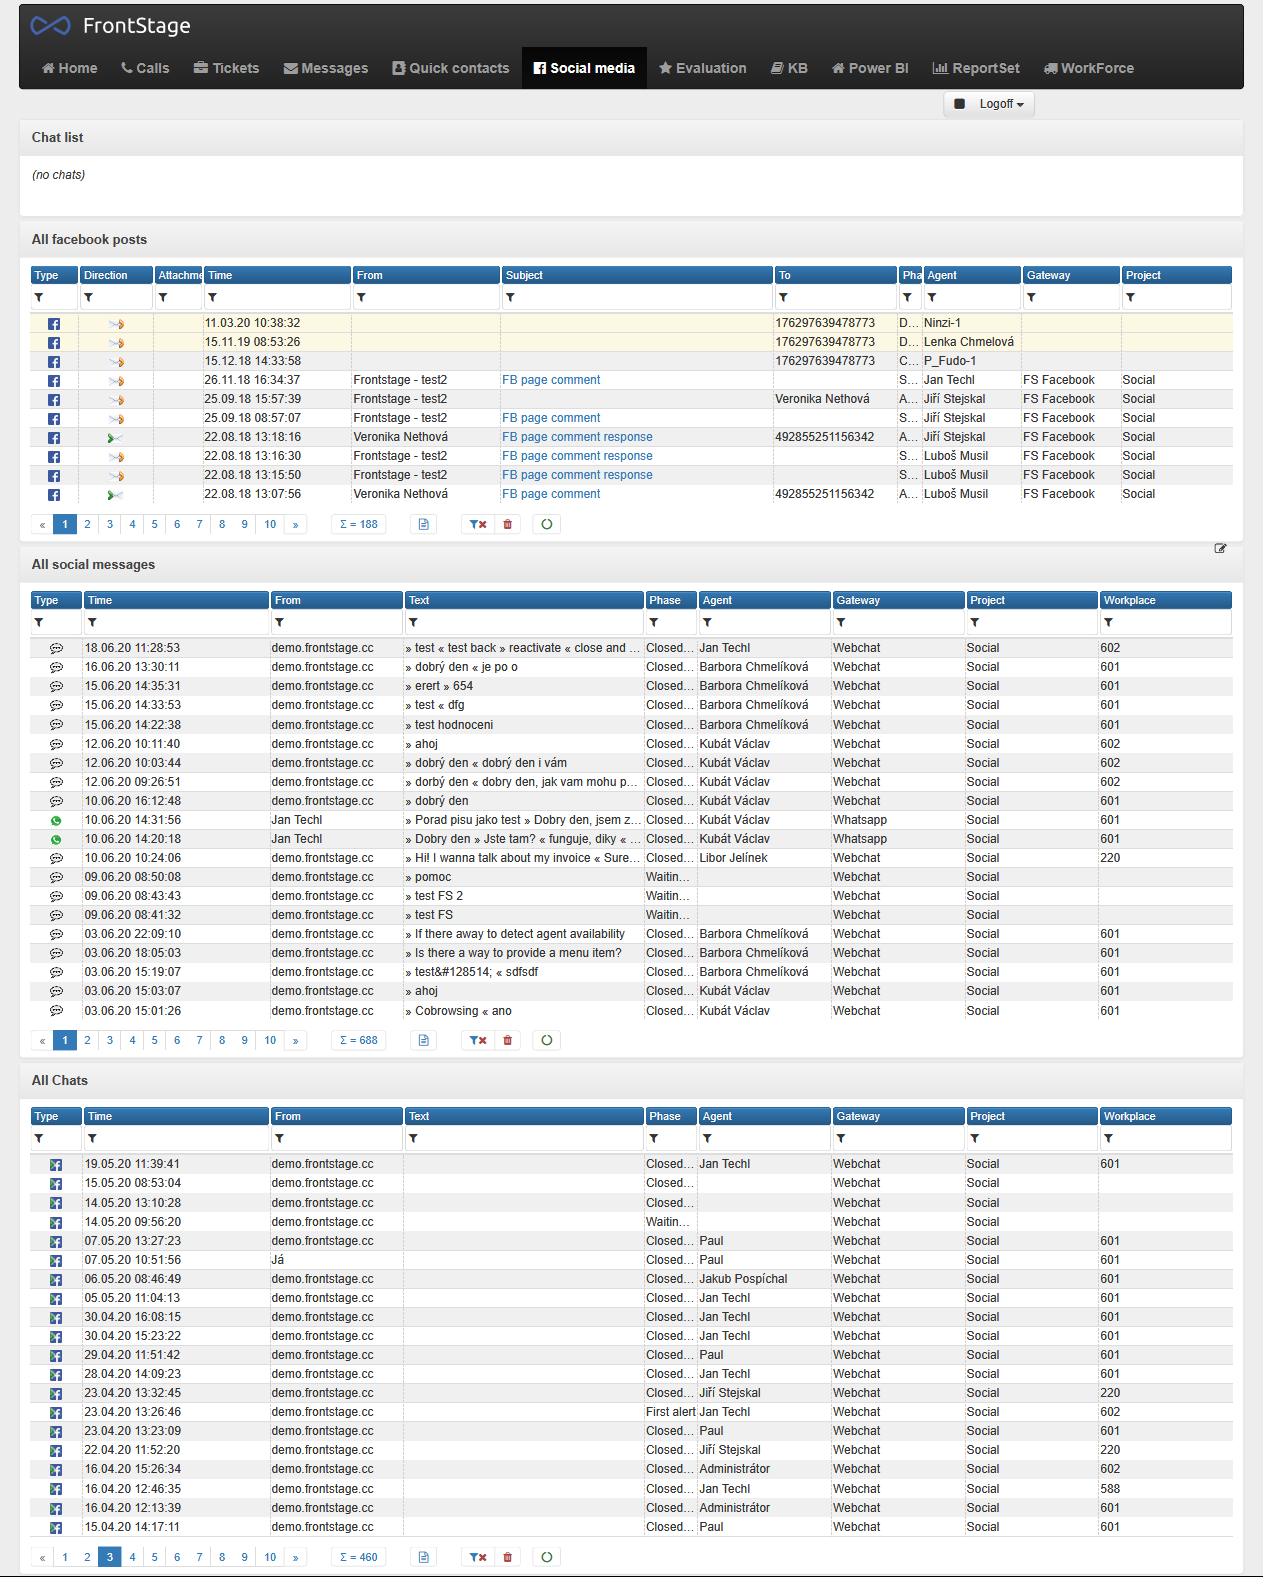
Chat
From the agent’s point of view, they work with all chat types in the same way in the same environment and analogously to other types of communication. The tab is usually named Chat or Social platforms. There you will find conversations from all chats used by the contact center, which are usually divided into those for the logged-in agent (their active ones, all of them), and all conversations for the entire contact center.
Note
FrontStage is richly customizable, so the actual form in which you will work with chat may be slightly different than the illustrations used.
Open and view
Opening the chat is possible within portlet Chat list (active conversations) or from any data grid, like My active chats, All my chats, column Title or Conversation type, etc.

Note
A pop-up window can also alert you to an inbound chat, which can be useful when you’re in another app. See more. Notifications.
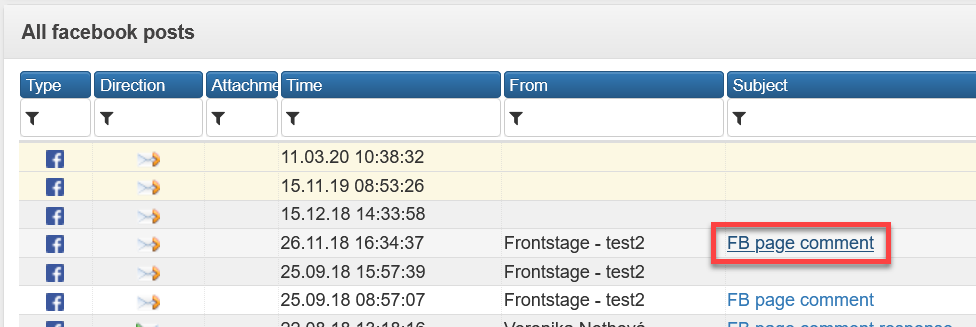
The chat editor appears after the action. Colour of chat opened in Chat list changes to orange (already read)
You can see the URL of the page where the visitor is and the information about them is available, such as when the chat started, what project the conversation is about, etc. This corresponds to the editor layout structure into the following parts:
Buttons for working with a conversation ([1]), changing according to the status of communication
Tabs ([2]) for metadata, history, associated issue, notes, and other related information
The conversation itself ([4])
Depending on the chat status, you can do the following with the communication:
Accept or return messages back to distribution
Reply (engage in conversation)
Finish it as completed
Mark it as spam
Accept or return it to queue
To respond to (reply and finish) a chat, you must accept it for yourself. Thus, you are indicating that you will pay attention to the visitor now.

You can return a chat received by mistake to the distribution. FrontStage will look for another suitable agent.

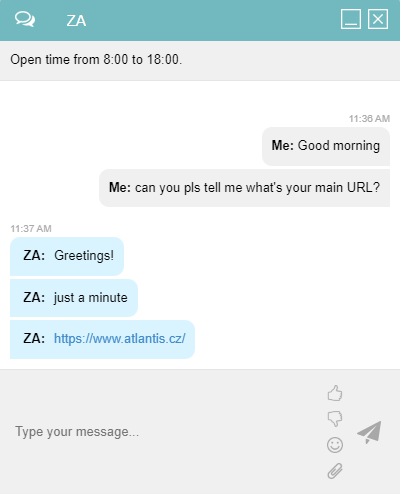
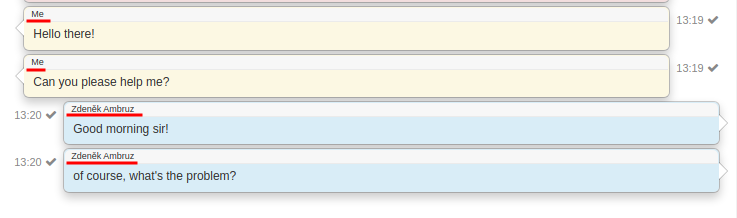
Reply
You can reply the message at the end of the conversation, where’s a text field for this purpose. You can send the message by pressing a button with  icon. When sent, the colour indicated in Chat list changes to green (replied)

In some types of chat and their settings, you can insert emoticons, attachment, picture, etc. into the message.
URL address to a message
During an ongoing chat, there’s an option to send a URL link via the dedicated button. If you don’t use this button to send the link, it will be displayed to the customer without the possibility of clicking on it right away!
The button is located next to the answer text area.

By pressing it you will open a window for entering the URL address.
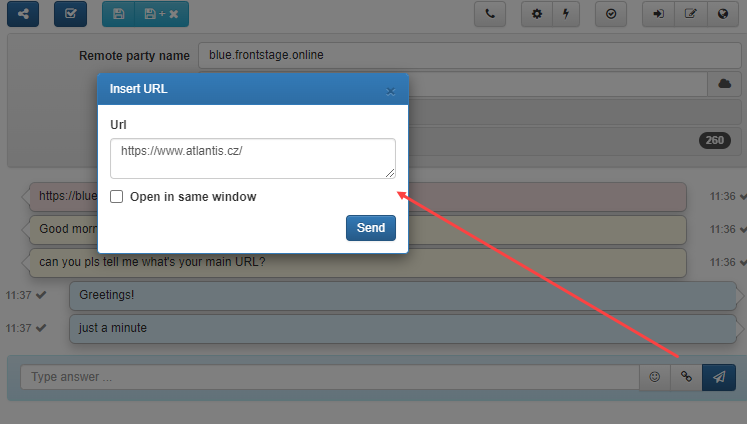
Open in same window parameter - If checked, clicking on the sent link will cause the link to be opened in the same window as the ongoing chat, which means the chat is no longer visible to the customer. If not checked, the link will open in a new browser tab.
Pressing Send button will display the link to the customer
Finish
One of the options after accepting the chat is to process it. That means you have completed the request or by any other means processed the chat.

Mark as spam
In case, you receive a chat, which is not wanted, disturbing or just not relevant for you, mark it as a spam. Press the Spam button, which marks the conversation as spam and closes the window.

Important
By default, the button has no meaning, but you can decide that messages marked in this way will not appear in the statistics, will not be offered to anyone, etc. With this functionality, you rather mark conversations that you do not want to deal with.
Inserting snippets and their templates into chat
Within the ongoing chat, you can insert snippets to help you communicate faster with your client. You insert them using keyboard shortcuts. You can use templates to prepare snippets in advance.
Snippets usage
Attention
To use snippets, you must know the current configuration of your installation’s hotkeys. This information should be provided by the system admin/supervisor.
Sample configuration:
Activate selection - character |
Confirm selection - character :
While the chat is in progress, type | when the preview of available snippets will appear. These are limited based on template-rules. There is a maximum of 8 snippets in the preview that match the rules.

You can select a particular snippet by clicking with the mouse or typing its shortcut and confirm with :. When you type the shortcut, the preview is updated with this value.

After confirmation, the snippet is ready to be sent.

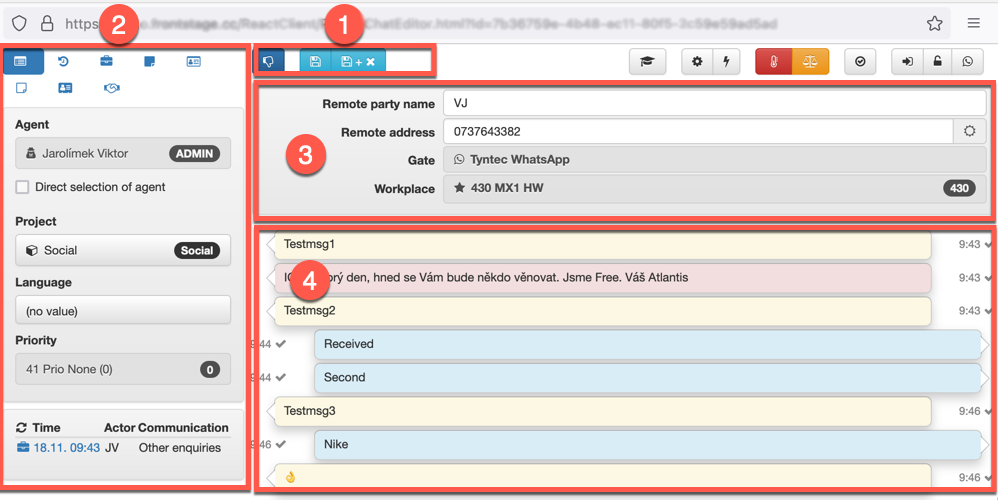
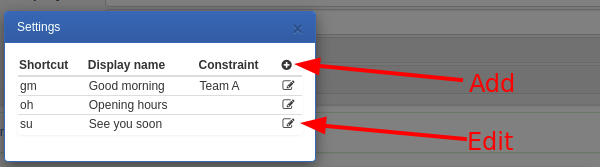
You can view the list of available snippets in the chat editor by clicking on the button in the header. Here, note the abbreviations that are chosen for each snippet.

You can edit snippets or add templates to them (assuming sufficient permissions).
Creating a new template
Press the add button to open a window where you can define the snippet. Values:
Shortcut - A value for quick snippet selection during a chat
Display name - displayed in list
Group name - categorization into groups
Content - the snippet text inserted into the chat
Scope
All - visible to all
Me - visible only to me
MyTeam - only visible within the team
Only language - The snippet will be limited to a specific language, it will not be offered for others. If not filled, it is always offered.
Constraint - When activated, you then select from drop-down box
No constraint - visible everywhere
Only project - only visible if the chat is in a specific project
Only topic - Only visible if the chat has a specific topic
Only crew - Visible only for members of a specific crew
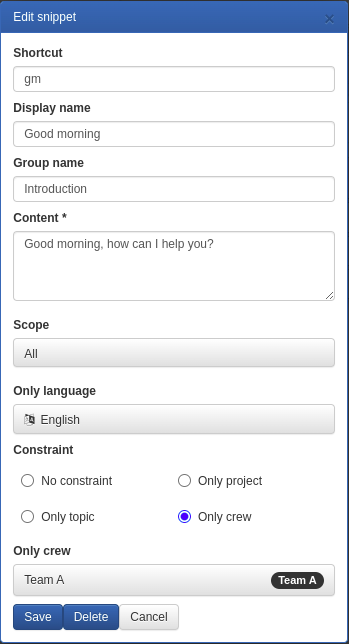
To confirm, press Save. To delete a template, there is the Delete button.
Possible problems when writing
You want to type a character in a chat that also activates snippets - type the character and press Esc, the character will appear in the chat box
You have accidentally activated snippet selection in a parsed word and continued typing - press Esc; the typed text is preserved, and the snippet selection is terminated
Note
Snippets settings is described in Configuration section.
User settings
You can adjust the look and behaviour, settings can be triggered in an opened chat window, by clicking the Settings button.
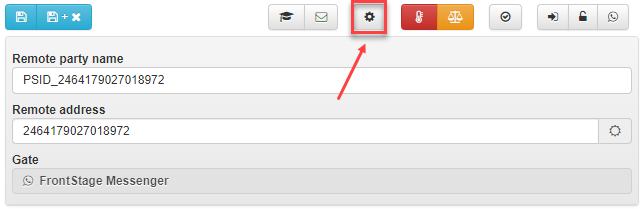
Settings:
section Conversation view settings
Reverse order of sentences (the newest on top) - by replica here is meant the message from you or the customer. If turned off, last message will be at the bottom.
Response zone on top - the reply area is by default at the bottom. After turning on, it’s at the top, under the chat header.
Show party name at each sentence - if turned on, every chat message will show the sender in it’s header. Hidden by default.
Number of lines in send box - selection from pre-defined values. If multiple rows chosen, you will be able to see even the long responses as whole.
section Related communication should be opened … - related communication can be opened in two ways.
by clicking on glyph
in new window
in same window
by clicking on time
in new window
in same window
It influences the transition to another communication, which has something to do with the chat’s issue.

switch Show related communication in Issue panel - show/hide links shown on the picture above