Adding and editing agents
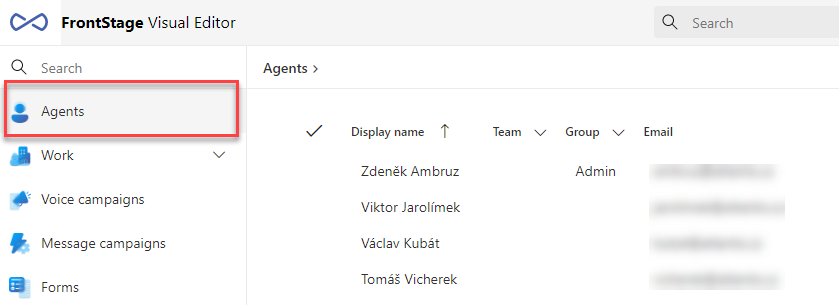
You can add or edit the agent with help of the agent visual editor (VEA), which is a tool for quick and clear work with agent’s accounts. VEA can be opened from visual editor list, where it’s listed as Agents
After opening VEA, you will be able to see all the agents in the system, for which you have appropriate permissons. The list can containt, apart of the default columns, any number of additional columns, therefore we do not list them all. The number of columns is dependent on the underlaying data querry.
Controls and layout are described in the User interface section.
How to create an agent
In the visual editor, click on the Insert new agent from template button, a pop-up window will be opened and you have to inset the Name. You have two options for inserting here, using the template or creating a blank account.
Without a template - if no template selected a blank agent account will be created

Template selected - when a particular template is selected, additional switches will be displayed, that can specify which data should be filled from the template
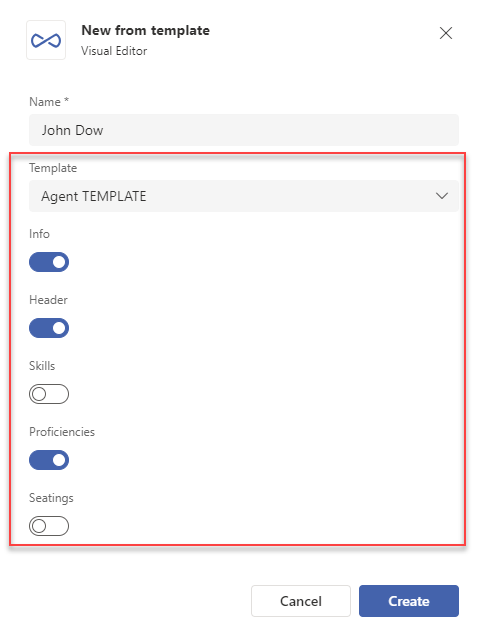
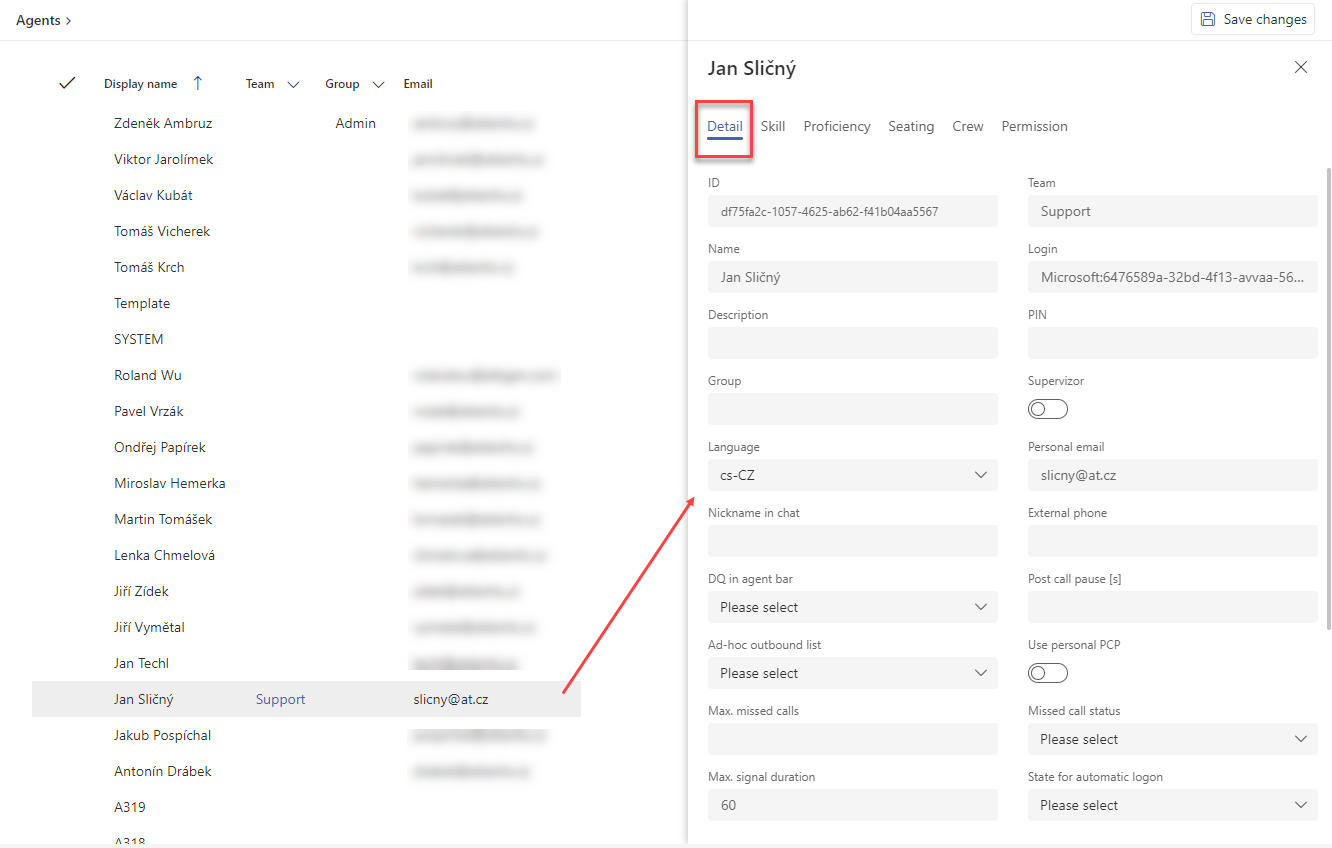
After clicking the Create button, agent will appear in the list and also his/her form will be displayed immediatelly (Detail tab). This subform contains a lot of fields, which you can fill in, the meaning of particular fields can be found in admin section.
Data mandatory for the base functionality:
By these actions, you have the base of the profile filled in.
Switch to the Skill tab, where you will fill in the agent skills. Controls described below.
The agent must have assigned at least one queue and appropriate communication channels.

Switch to the Proficiency tab, where you will fill in the proficiencies for available languages and available communication channels. Controls described below.
The agent must have assigned proficiency for at leats one language within communication channel, which he can operate (you’ve set the channels in the prev step)
Switch to the Seating tab, where you will fill in the workplace login and usage possibilities for the agent. Controls described below.
The agent must have assigned at least one workplace, which can distribute his allowed communication channels.
The agent must have the option to login here from some device (ReactClient, DesktopClient, etc.)
After filling in the data on these tabs, press the Save changes button. The agent’s profile is now ready to be used.
Adding agent template
An agent template is created by creating a sample agent profile that best represents your starting situation and then marking it as a template. This template will then be available for transferring pre-packaged data when you create new agents.
Create the sample agent the same way, as it was described above.
After filling all the data, go to Detail tab, where do check the Template option, then save.
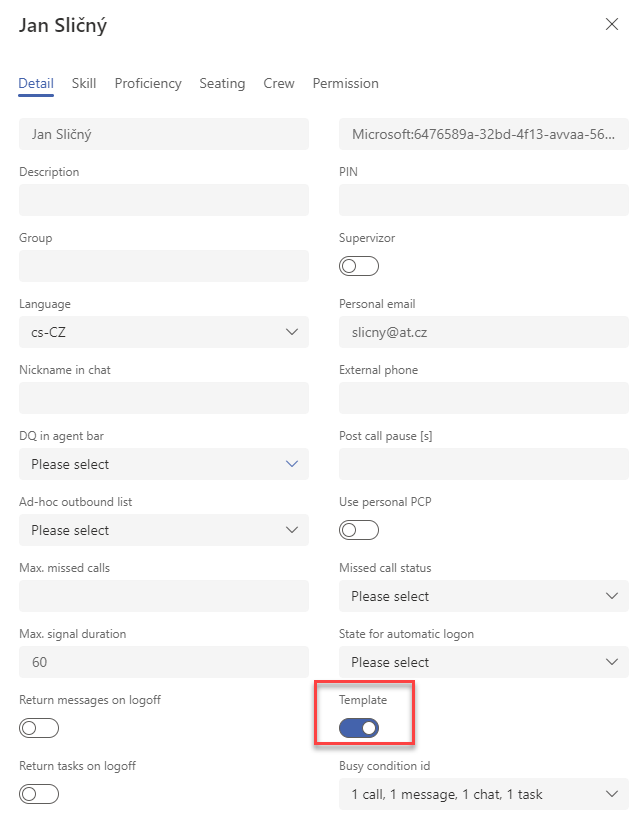
When creating a new agent, this template will be already available.
Updating agent from template
You can update an existing agent using selected template.
Open his/her profile from the list.
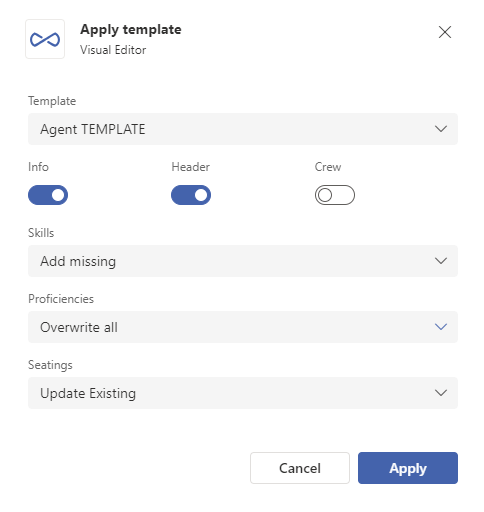
There is a Apply template button located in the right upper corner. Press it to invoke the window for the template selection.
Template selection will invoke more controls to specify the values to transfer.
Info, Header and Crews switches - If active, agent values will be rewritten by the template values.
The Info switch transfers from the Detail tab these items - “Description”, “Team”, “Supervisor” flag, “Administrátor” flag, “Group”, “Preference”
The Header switch transfers all the other items of the tab not mentioned above
Proficiencies, Skills and Seatings DDN - Multiple choices for each item. They are evaluated separatelly.
Update existing - If the settings already exist for the agent, they are rewritten by the template value (for instance, a skill level for a particular queue). If it doesn’t exist, nothing is transferred.
Overwrite all - The template values transferred to the agent.
Add missing - If the settings don’t exist for the agent, it is added from the template (for instance, a skill level for a particular queue).
Note
Youi can update multiple agents at once by marking their profiles in the list and using the Apply template button.
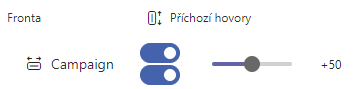
Project skills
The skill matrix allows you to configure the routing of requests from individual channels (voice, e-mail, sms… etc.) to contact center agents according to their knowledge (skill-based routing). One agent has multiple skills. The absence of a record or a skill with a zero value indicates that the agent may not receive a request distributed in the project.
Skill value (0-100) for the project; the value does not necessarily correspond to the actual proficiency but rather the preferences to which agents and in what order the communication in the channel should be distributed
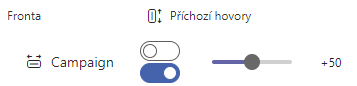
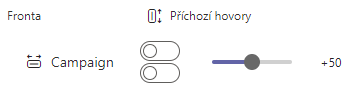
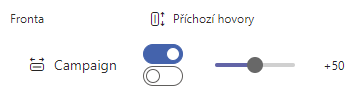
Enabling/Disabling the channel for a particular agent and project is performed by a supervisor via VEA (admin has also this possibility), agent can’t adjust this settings in his application.
Engaging/Disengaging from a channel within a project is possible from agent’s perspective (but it also depends on the current configuration, so it can be also disabled)
In the case of an inbound call (PbxIn), the distribution mechanism prioritizes the available agents with the highest skill for the project to distribute the inbound call based on the time of the last agent call (the agent with no longest call assigned). The condition for distribution of a call (or communication in a given channel) to an agent is the fact that he as to be “Enabled” and also “Engaged”.
The following table shows the resulting settings for distributing communication to the agent according to the channel settings defined by the supervisor and the agent. The ability to connect to various communication channels is subject to the assigned permissions to make changes to the connection to projects. An example is illustrated on inbound calls. The settings of the other communication channels work analogously.
ReactClient indication |
TeamsClient indication |
Skills (VEA) |
Effect of combination settings |
|---|---|---|---|
|
|
|
|
|
|
|
|
|
|
|
|
|
|
|
|


Particular administration’s items refference available here.
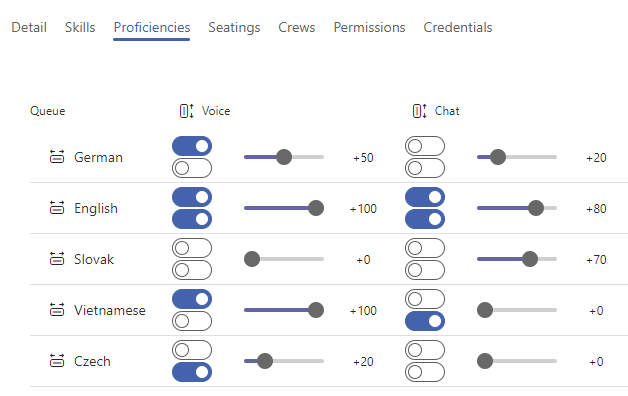
Proficiencies
The knowledge matrix allows you to configure the language proficiencies of each agent separately for voice, offline message and offline chat channels. One agent has multiple proficiencies. The absence of a record or proficiency of zero indicates that the agent may not have project communication distributed to them.
Proficiency value (0-100) for a given language; the value does not necessarily need to correspond to the actual proficiency but rather preferences indicating to which agents and in what order the communication in the channel should be distributed
Enabling/Disabling language availability for a given agent and channel is performed by a supervisor.
Engaging/Disengaging a language for a given agent and channel is not possible from agent’s perspective. Only supervisor can do so.
The distribution mechanism is similar to that for skills.
Particular administration’s items refference available here.
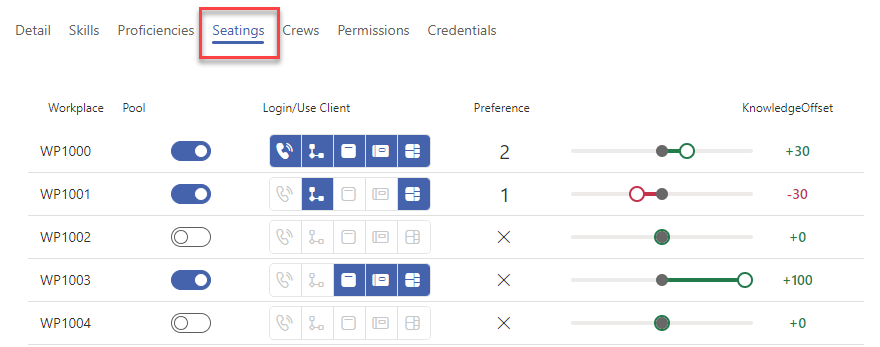
Seatings
The seating matrix defines agent permissions to workplaces (extensions, lines). A single agent can have access to multiple workplaces, but can use only one workplace at the time. The record has the nature of a permission, not a cast.
Knowledge offset - if the given workplace uses preferences (+) / penalties (-); it defines a change in agent proficiency after connecting to a workplace; if the value drops below 0, the gateway is 0, if it rises above 100, then 100 is considered; it allows less workload to be put on the same agent when, for example, they are on a home shift; this applies to all agent skills at once
Preference - If the agent has multiple workplaces to choose from - for the purposes of automated seating proposal when scheduling shifts (for WorkForce Management) you need to indicate if there are different assignment preferences for different extensions. Specify which extension should be proposed first, which extension should be second, etc.
For particular workplace options and their explanation see VEA - The Seatings tab
Particular administration’s items refference available here.
Agent personal ReactClient settings
The application editors( calls, messages, issues, contacts, etc.) have the possibility of customization at the user account level, i.e. each agent is able to customize its behavior according to its needs. Each editor has different customization options.
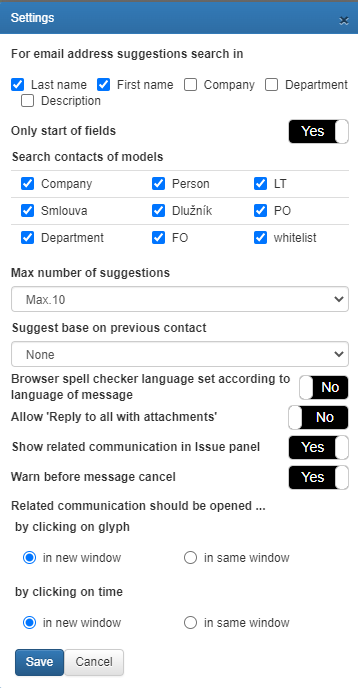
This function is not available in the basic settings, you need to enable it. Permissions are controlled by the PersoSettings role, which must be assigned to the agent to use the settings. You can do this via Agents
A settings button will then appear in the editor:
