Application server
To install the FronStage application server, we assume that you have prepared .exe files for the services/webs you are using, additional libraries (.dll) and the FronStage build you want to install.
Folder structure
On the selected disk (usually C:), create a structure
C:\Atlantis\Frontstage, and extract all the build components to the Fronstage folder.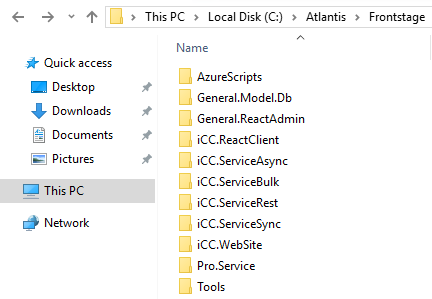
Add the
.exefile for the service to each service folder. They are not included in the build.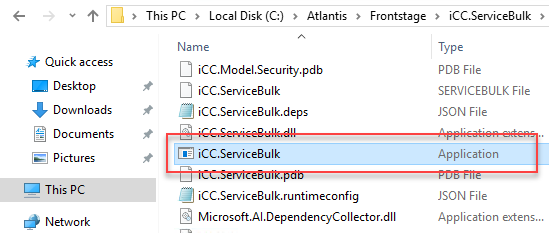
Put the additional libraries
icudt68.dll,icuin68.dll,icuuc68.dllinto the “iCC.ReactClient” folder.On the selected disk (usually C:), create a structure
C:\Atlantis\Certificates, and put your certificate in the Certificates folder. Similarly, createC:\Atlantis\Licencewhere you upload your license files.
Configuration
Through Azure, create accounts for unique applications, and they will use these accounts to authenticate access. I.e. for ReactClient, ReactAdmin, etc.
Open Azure and log in.
Open the “App registrations” section and select “New registration”.
Name your app appropriately and set it up.
In its details, you will find “Application (client) ID” and the password you entered when creating it.
You will need this information to configure FronStage web services.

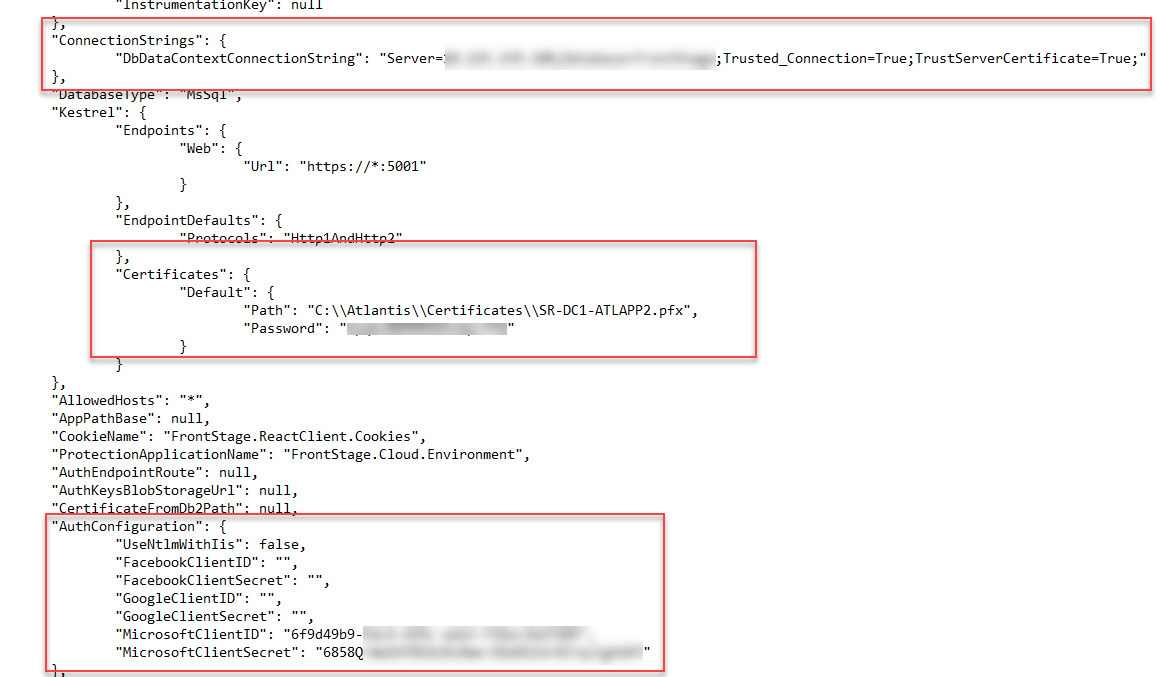
In the folder “FronStage”, for each web service, edit the configuration file
appsettings.json, where you edit:ConnectionStrings - Valid string for connection to the database. For example:
"Server=locallhost;Database=FrontStage;Trusted_Connection=True;TrustServerCertificate=True;"Certificates - Edit the path to correspond with the structure you created earlier where the certificate is located. Add its password.
AuthConfiguration - Fill in the “MicrosoftClientID” and “MicrosoftClientSecret” that you previously created in Azure for this application.
Note
If necessary, you can also change the port. Recommended ports:
ProServer:5007
ReactClient: 5001
ReactAdmin: 5002
ServiceLink: 5015
ServiceRest: 5012
WebSite: 5010
Set a valid
ConnectionStringfor all other components of the build, such as services (ServiceBulk, ServiceRest, ServiceAsync, …) and the General.Model.Db utility. This is required to initialize the database and must be functional.Example of a string if the database and services are on the same server:
"DbDataContextConnectionString": "Server=locallhost;Database=FrontStage;Trusted_Connection=True;TrustServerCertificate=True;"
For General.Model.Db to work properly, you must have .NET installed on the server. If the database and application servers are on the same machine, you have already added these components when you installed SQL Server. Otherwise, read here.
To check the functionality of General.Model.Db open its folder and run “powershell”
In it, type the test command
dotnet general.model.db.dll getall a.json agentIf the configuration is fine, the response will be something like:

Otherwise, you will see an error message such as
dotnet' is not recognized as the name of a cmdlet
Register parts of FrontStage as services (“NT services” - they run in the background without user interaction). Registration is done via “powershell”, where you register one service with the command -
sc create ServiceName binpath="AppExePath". You can create a batch file and register them all at once:sc create FS.Pro.Service binpath="C:\Atlantis\Frontstage\Pro.Service\Pro.Service.exe" sc create FS.ReactAdmin.General binpath="C:\Atlantis\Frontstage\General.ReactAdmin\General.ReactAdmin.exe" sc create FS.ReactClient.iCC binpath="C:\Atlantis\Frontstage\iCC.ReactClient\iCC.ReactClient.exe" sc create FS.ServiceAsync.iCC binpath="C:\Atlantis\Frontstage\iCC.ServiceAsync\iCC.ServiceAsync.exe" sc create FS.ServiceBulk.iCC binpath="C:\Atlantis\Frontstage\iCC.ServiceBulk\iCC.ServiceBulk.exe" sc create FS.ServiceLink.iCC binpath="C:\Atlantis\Frontstage\iCC.ServiceLink\iCC.ServiceLink.exe" sc create FS.ServiceRest binpath="C:\Atlantis\Frontstage\iCC.ServiceRest\iCC.ServiceRest.exe" sc create FS.ServiceSync.iCC binpath="C:\Atlantis\Frontstage\iCC.ServiceSync\iCC.ServiceSync.exe" sc create FS.SRecMatching.iCC binpath="C:\Atlantis\Frontstage\SRec.MatchingICC\SRec.MatchingICC.exe" sc create FS.WebSite.iCC binpath="C:\Atlantis\Frontstage\iCC.WebSite\iCC.WebSite.exe" pause
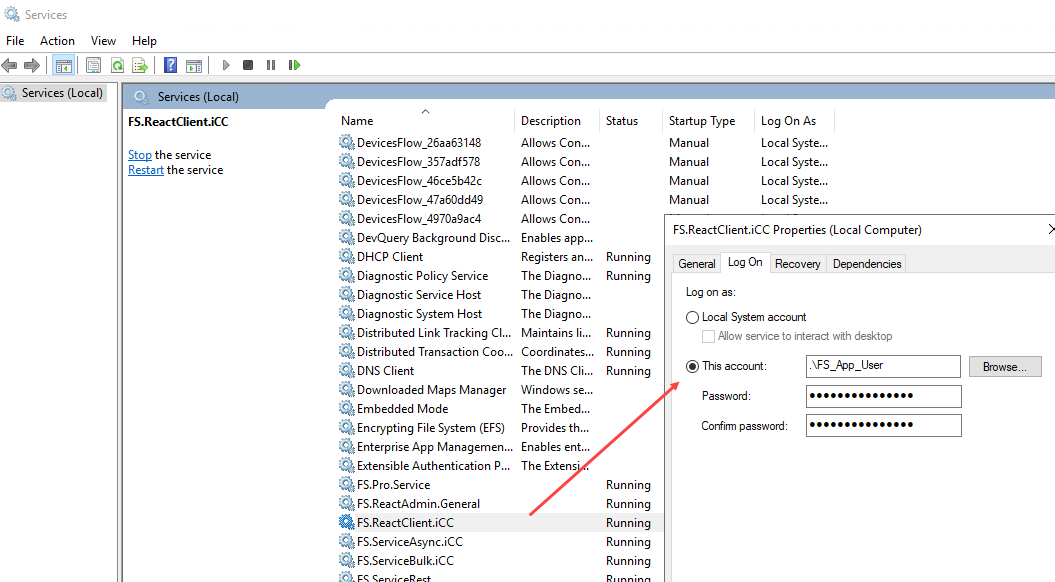
Registered services must run under a dedicated user. If the database and application server are on the same machine, you have already created the user, see Dedicated accounts. Set all services to run under this account.
Open the “Services” application in Windows.
Locate the desired service and open its Properties.
Under the “Log on” tab, fill in the details of the dedicated account.
Note
If the servers were on separate machines and not in the domain, it is necessary to use SQL authentication in the ConnectionString of the service.
Create a database structure using General.Model.Db. Initialize it from “powershell” using
dotnet general.model.db.dll batch ConfigFile.json. Real example:dotnet general.model.db.dll batch Data/init-basic.json.The initialization file contains a set of data for creating the database structure. It also contains data queries, application layouts (portals, portlets), language sets, etc. You will see the exact contents when you open this file.
The default general files are part of the folders of this utility (“Data” and “OOB” folders), the default configuration “OOB1” is preferred or specially prepared for specific subjects (“FTI”, “HGC”, …). You can find out which file to initialize according to your FronStage consultant.
Upload the license using General.Model.Db, use the command
dotnet General.Model.Db.dll setlicense LicenseFile.lic.The license consists of two files:
FileName.h.licandFileName.c.lic.You have to upload both files!
Enable the TCP ports of each service on the application server firewall. For the assigned ports, see the steps above.
Enable TCP port 1430 on the database server firewall.
We recommend adding key users as system administrators in ReactAdmin, in case of service support.
Open
.\Frontstage\General.ReactAdmin\appsettings.json.If it does not exist, create an AdminUsers structure:
"AdminUsers": [

                {
                        "LoginName": "Microsoft:XXXXXXXX-XXXX-XXXX-XXXX-XXXXXXXXXXXX",
                        "FullName": "User Name"
                }]
You can get a valid MS ID and name by launching ReactAdmin in your web browser, which will list your account information if it is not already registered for the application.
If everything went correctly, you can open a web browser and enter an address of the form
ServerName:AppPort/to launch the desired FronStage application.