Database server
Here we will cover the on-prem installation for Microsoft SQL server.
Installation preparation
Each time you install a database server, you need to consider the planned workload individually and the growth of stored data once you actively use FrontStage. Here are recommendations for you to consider during your installation. However, neither the recommendations nor this guide can cover all possibilities. It is always better to consult or entrust the solution to an experienced DBA.
Folder structure
We recommend creating several partitions on the database server to store the database files (consider the location according to the expected load). Do not create a complex directory structure so that files are not overly immersed. We recommend reserving the C: drive only for the operating system or the “Temp DB” folder.
You can ensure all databases are located in this path by setting the data root folder during SQL Server installation. Alternatively, later, when creating the database.
Installation optimalization
Basic optimizations include placing application databases on the fastest possible storage, such as SSD or fast disk arrays. For the most bulky installations, we recommend using a Raid10 disk array.
We recommend reserving these repositories for LDF files. To achieve the highest possible speed, separate LDF and MDF files, with each using its own disk controller.
This recommendation applies even more to the data and logging directory of the TempDB database.
Dedicated accounts
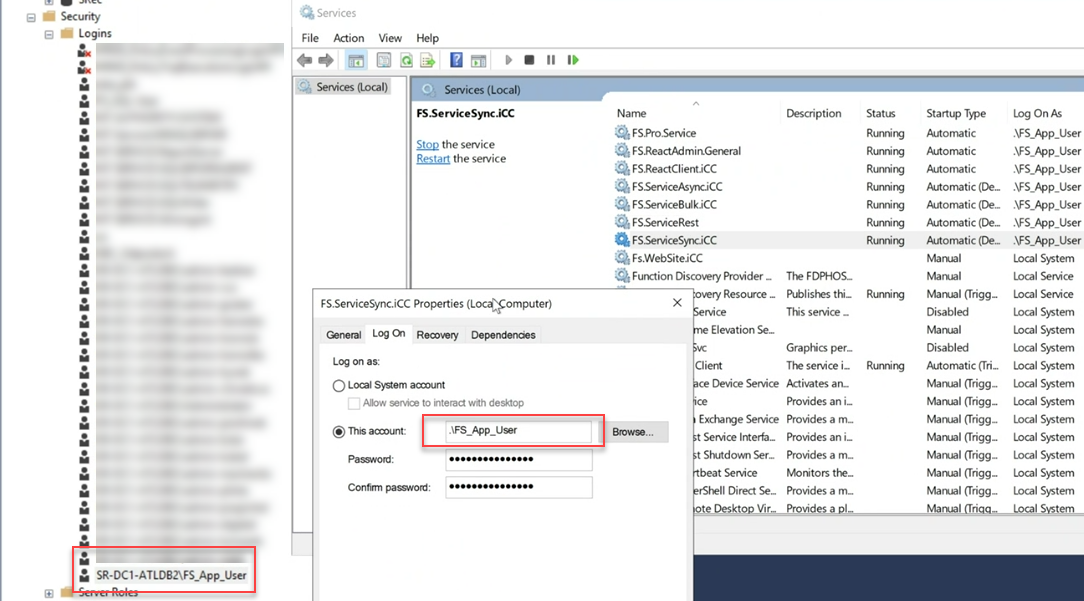
Create a dedicated account for FrontStage to log services into the database. Assign it access to the SQL server. If the database server and application server are on a different machine, it is recommended that this account be in the domain to simplify subsequent configuration and authentication.
Database access:
If the server is in a domain, it is possible to use a dedicated domain account for technician access. However, if more than one technician is working with it, it will not be possible to distinguish which one is making which changes.
We recommend creating accounts as follows:
SysAdmin account (sa) - Created when installing SQL server, when selecting Mixed Mode authentication
“FS admin” - Dedicated account of the technician who will work with the database. For logging changes, we recommend to have a separate account for each person.
Collation
It is essential to select the correct collation during SQL Server installation, especially for languages that use special characters, because it cannot be changed after installation. The full-text search in FrontStage depends on it, which will not work if the collation is wrong.

Database server installation
At a minimum, you must install the following SQL Server components: the Database Engine with full-text search (FTS). We recommend installing Reporting Services, Data Quality Services, and SQL Server Management Studio (SSMS).
SQL Server installation example
Caution
Unfortunately, SQL Server installation varies by operating system, version, and edition. See Microsoft documentation for installation details. The following tutorial is just an example of a possible SQL Server 2019 installation process.
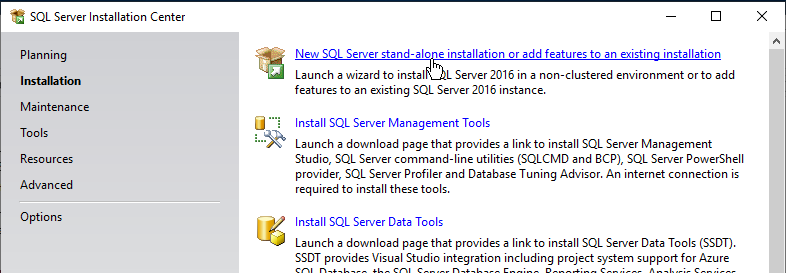
Spusťte SQL Server Installation Center a v pravém menu vyberte Installation klepněte na první odkaz New SQL Server stand-alone installation or add features to an existing installation.
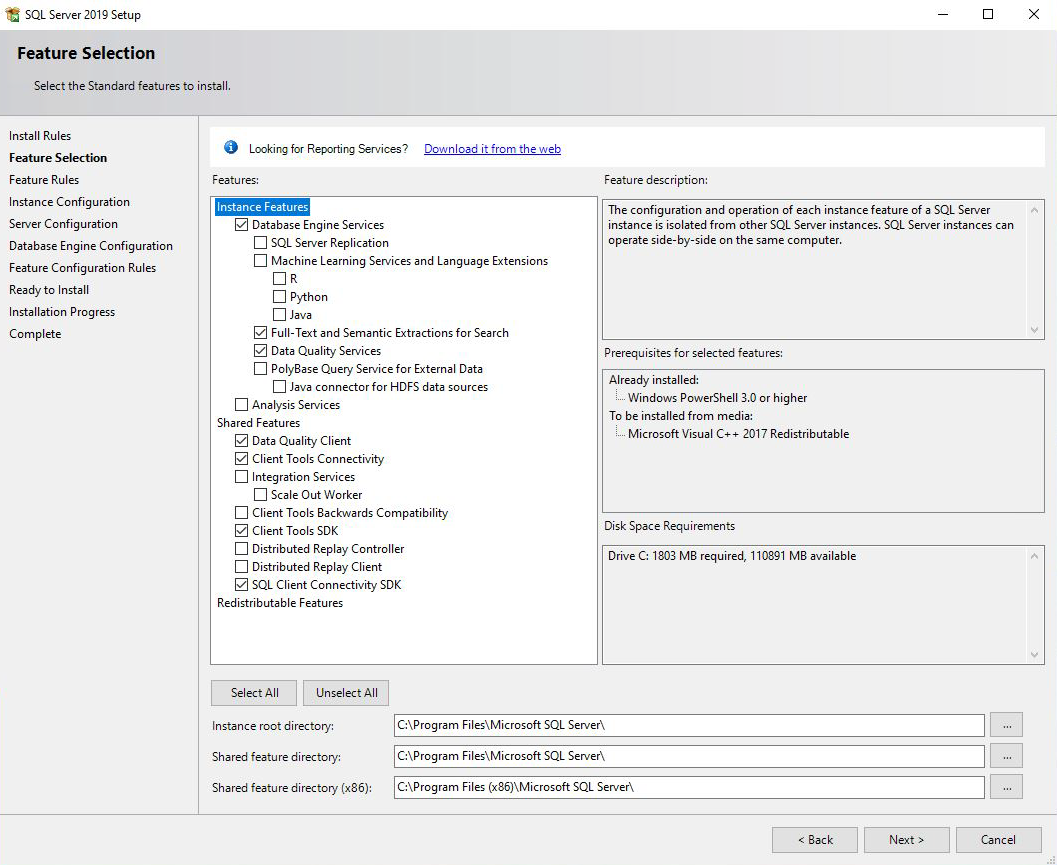
Continue with the next steps to Feature Selection.
Database Engine and FTS – select at least Database Engine Service and Full-Text and Semantic Extractions for Search.
Reporting Services – Some installers offer a Reporting Services installation. Other times, the corresponding version of Reporting Services must be downloaded from Microsoft’s website and installed afterward.
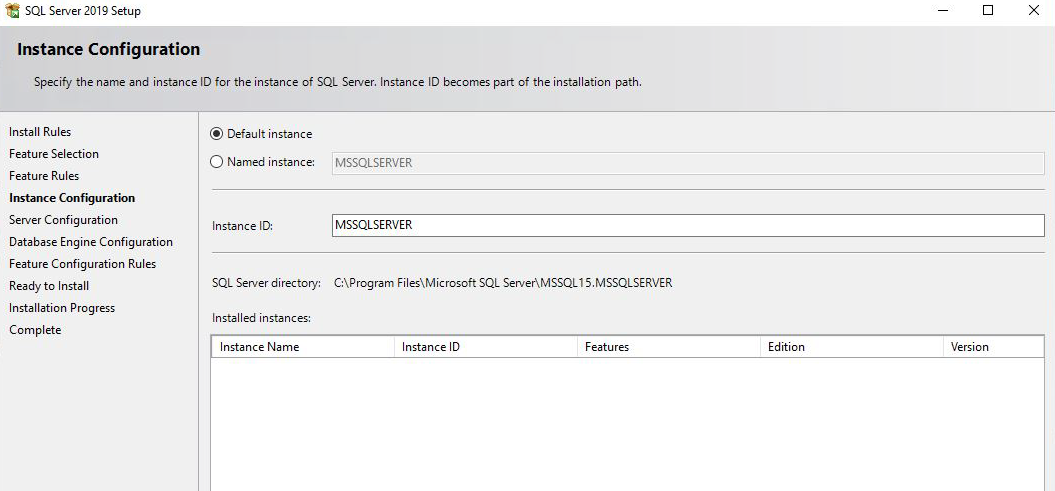
Continue with the following steps to Instance Configuration, where you must choose between the default or named instance. If possible, use the Default instance.
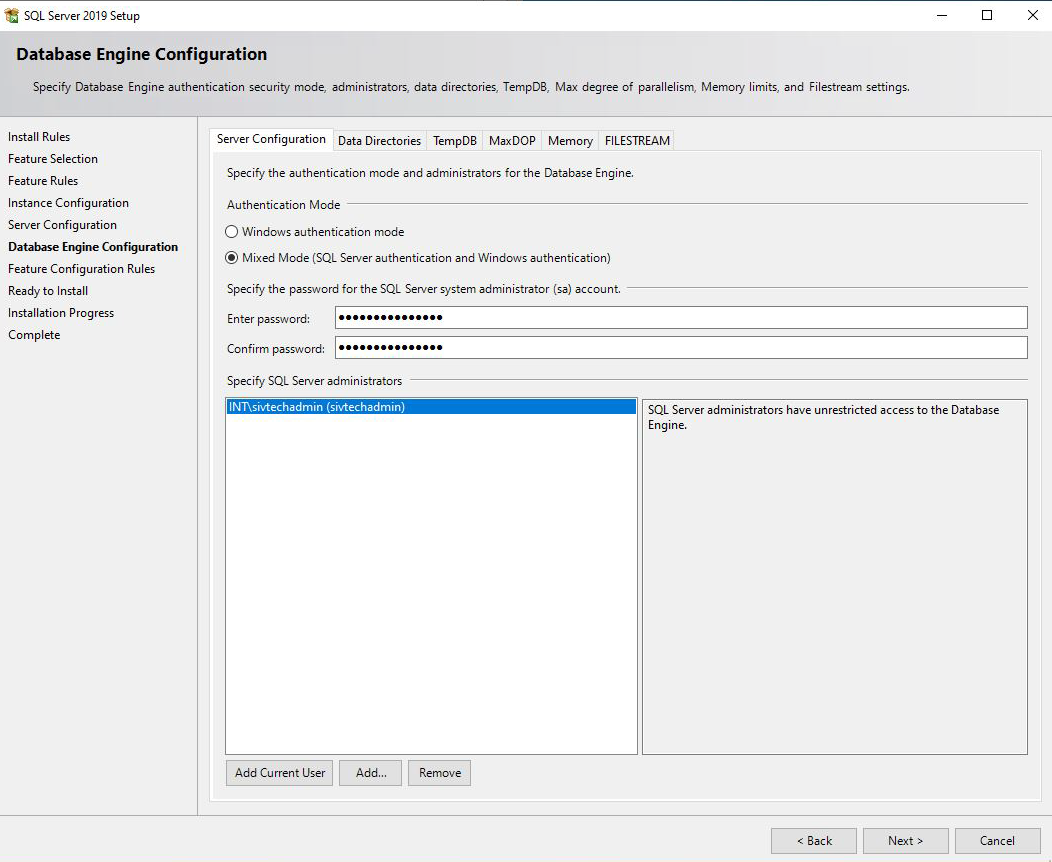
Continue with the following steps to Database Engine Configuration on the Server Configuration tab, where you set the authentication method. We recommend Mixed Mode, i.e. where you can log in with a SQL Server administrator account in addition to Windows authentication.
choose the password of the sa administrator
select the accounts that should have unrestricted access – if you created dedicated account, select at least this one
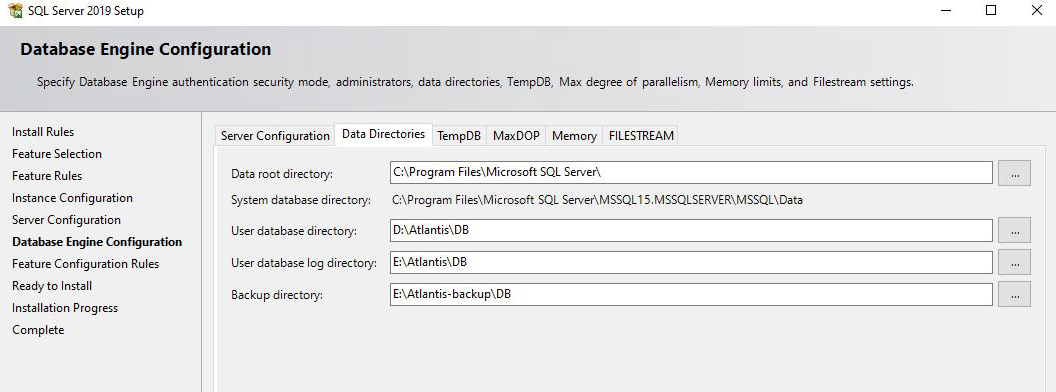
Still on the Database Engine Configuration step, but on the Data Directories tab, it is expected to change Data root directory and others to the recommended values; see Folder structure. This will also change the location on the TempDB tab.
Finish the remaining installation steps.
Reporting Services
If you want to use reporting, you need Reporting Services.
Some installers offer to install Reporting Services during installation. Other times, you need to find, download, and install the appropriate version of Reporting Services from the Microsoft website.
SQL Server Management Studio
We recommend that you also install SQL Server Management Studio (SSMS). The latest version can be found on the official MS website . You can install SSMS on your own computer, but it is also advisable to have it on the server.
Drivers and libraries
Install additional drivers to the server:
Note
Verify that the downloaded driver is compatible with your version of SQL Server.
Install “SDK” and “ASP.NET Core Runtime”, which can be found on the official website