Plans
In this section, we explain how you can work with plans in the WFM module. We recommend that you first read the plans concepts.
Reality
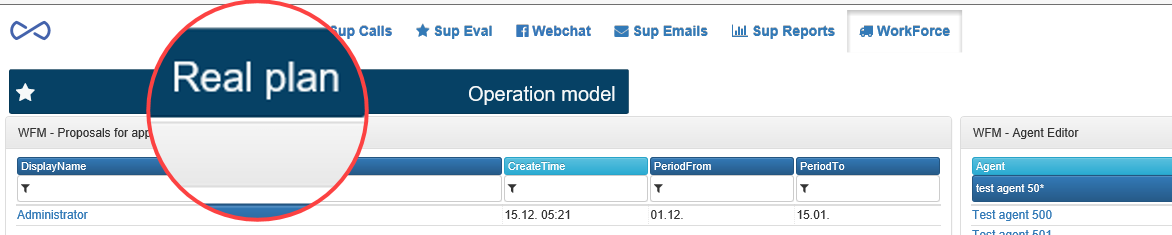
Depending on configuration, the actual plan is displayed in the shift viewer on the WFM homepage. Alternatively WFM homepage contains only a link or a button to open actual plan in a new window.
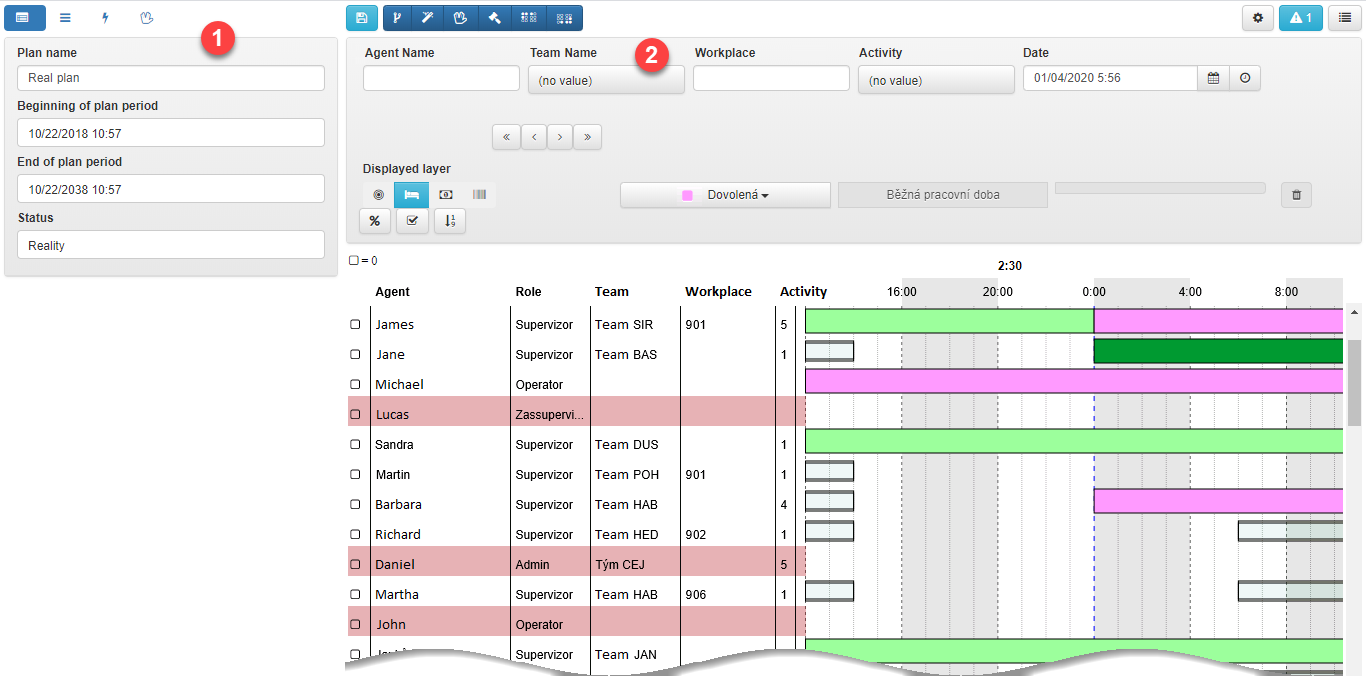
The advantage of the second method is that the newly opened window shows all tools useful for working with plans – information in tabs [1] on the left and action buttons [2] in the upper blue bar.
Quick actual plan editation
Keep in mind that the only way to change actual plan is using alternative plans. However, actual plan editor offers quicker way to edit reality.
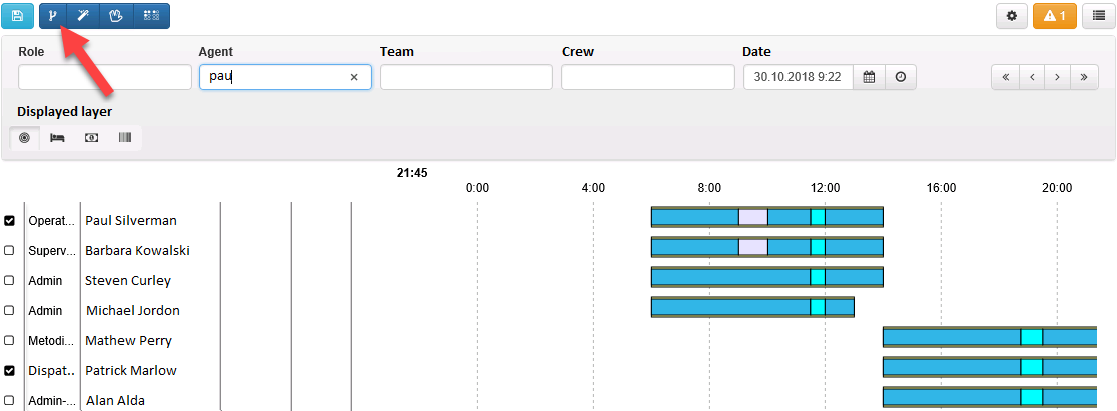
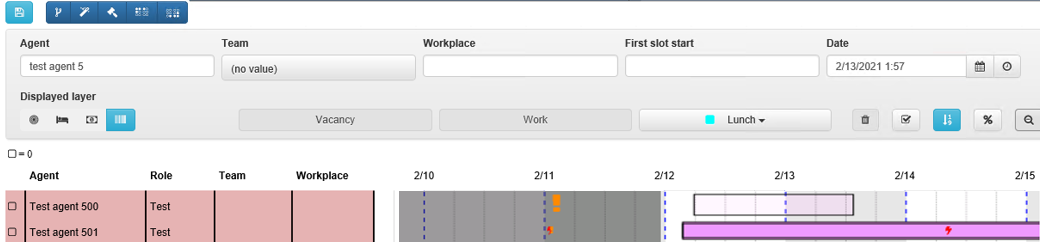
If user has a WfmPlanApproval permission of at least AllowFull level (usually methodologist and admin), he see layer switching buttons in actual plan editor. It allows him to change slots in more comfortable way.
After making some edits and pressing Save, these changes are recorded into temporary alternative plan. If there are some validation errors
with severity >1, used alternative plan is displayed and errors must be fixed by the user.
If there are no validation errors or with max 1 severity, changes are published to actual plan. In this case, it looks from user’s point of view, as directly editation of actual plan.
Alternative plans
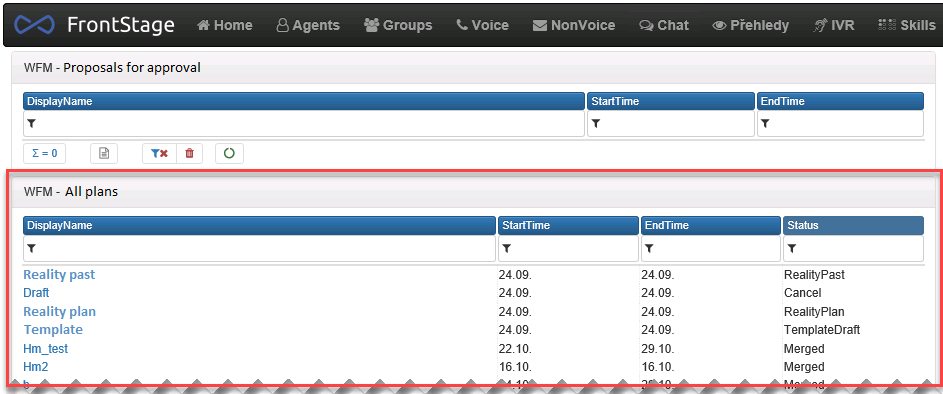
The homepage shows all existing alternative plans regardless of their status and period. Therefore, it is useful to use a filter, e.g. just for draft plans.
Creating alternative plans
You can create an alternative plan by forking from the actual plan.
Therefore, first open the actual plan editor.
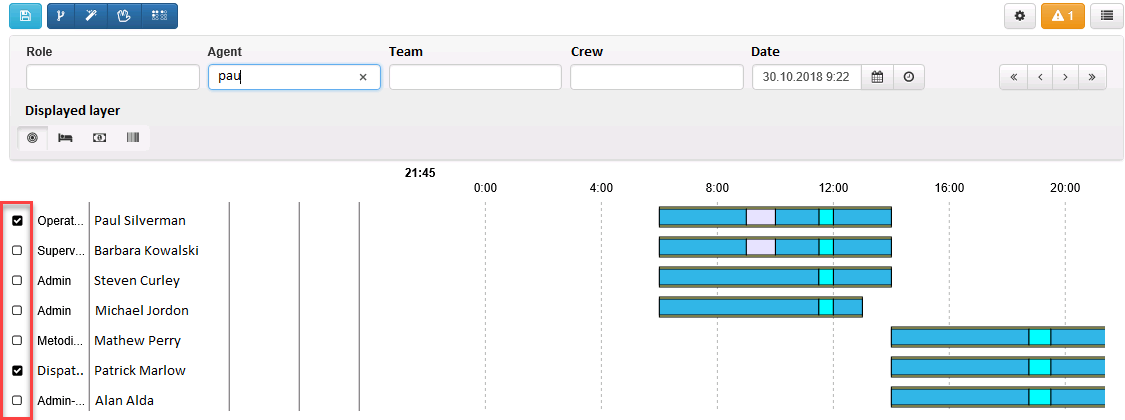
Check the plan members (the persons for whom you want to create a plan). You can also use a quick filter.
Tip
Plan members cannot be removed later. However if you add agent to a plan by mistake, simply don’t plan no activities for him.
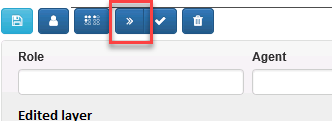
Click on the Create a plan button.
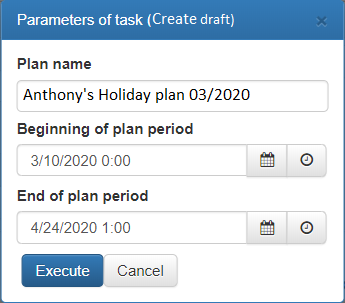
Choose an appropriate plan title and period. The default title is always the list of staff, yet it is better to come up with a more descriptive title, such as “Christmas 2018 vacations”. Although you can enter any time as the plan period start and end time, it is better to work with plans covering entire days; hence, you could select 0:00 as the start/end time.
Important
The plan period cannot be changed once a plan is created.
This operation will result in a new plan window being opened for the selected persons and period. Use the shift editor to create required slots for activities.
Same as any other plan, the plan needs to be validated and submitted for approval before it takes effect.
Comparing changes
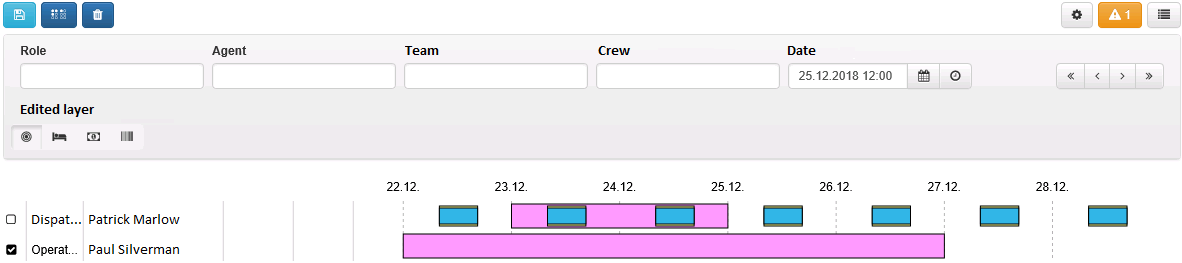
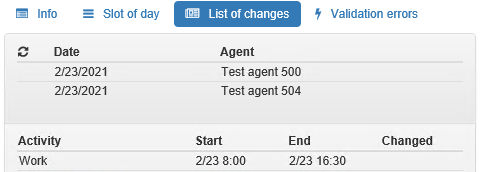
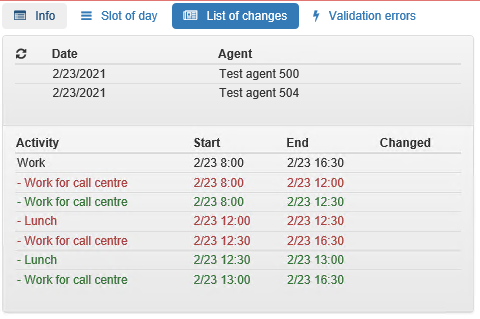
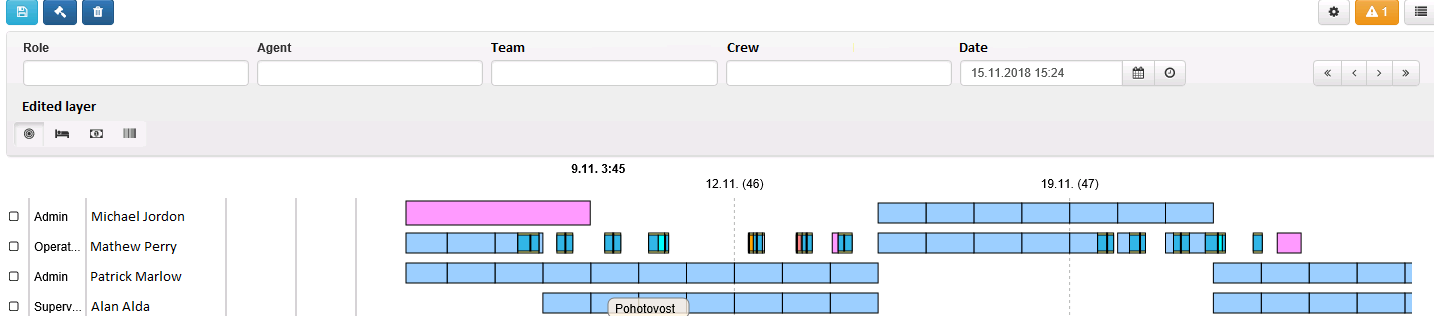
After saving a plan, you can compare the changes made with the actual plan. Click on the Change Overview tab to display days and staff assigned to the plan.
By clicking on a specific row in the bottom part, you can display the status and changes. Activities that have not been changed are displayed in black.
Green color indicates newly added activities, while red color is used for deleted activities.
Plan validation
Another option frequently used is validating a draft plan, i.e. verifying whether it meets all statutory requirements, limitations of each of the team members arising from their contract or status (pregnancy, minor person, etc.) and other limits usually applied in your call center.
Important
An exact validation algorithm is programmed according to the client’s requirements. For this reason, it is not described here in detail.
Press the Validate plan button to initiate a background validation process that will check these limitations.
Once the validation has been completed and if conflicts have been found, you can see the conflicts listed under the Validation errors tab. These conflicts are also shown on the slots concerned as ‘lightning’ and ‘exclamation mark’ symbols. The currently selected validation conflict is indicated with a bigger symbol.
Important
After making any changes to slots, you need to save the plan and validate it again – it is not enough to validate it without saving the changes.
Validation conflicts are classified by severity:
Level 1 severity – warning (displayed as exclamation marks) – You can still submit the plan to the methodologist for approval.
Level 2 severity – error (displayed as lightings) – You cannot submit a plan with this error to the methodologist at all.
Submission for approval
Before a draft plan can be submitted to the methodologist for approval, it needs to be validated; any conflicts established may only be of the warning type.
When this condition has been fulfilled, the action bar will show the Submit draft button. (In addition, the methodologist will see the Publish in the actual plan button since even the methodologist’s drafts need to be approved.)
Plan approved
Plans submitted for approval are displayed to the methodologist in the Drafts for approval list. Drafts are also displayed to the supervisor, yet they cannot approve them.
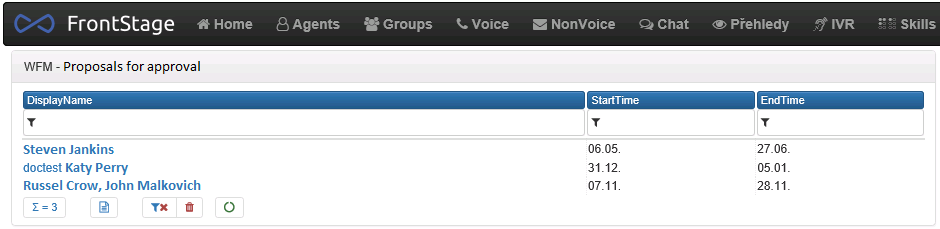
Depending on user’s permissions and situation, they will see different buttons:

He can propose a draft [1] to be approved by methodologist;
If he or she is a metodologist, he or she can publish the plan as actual [2];
The metodologist can reject [3] and return the plan to the draft status; or
Approve [4] and publish the plan as the actual plan.
Discarding a plan
If you do not want to use a draft plan anymore, you can discard it. This means assigning the cancelled status to the plan, not actually deleting it.
To discard a plan, use the Discard plan button in the Plan Editor.
Automatic planning
First, make sure you have done the initial setup (i.e. created weekly templates, combined templates in rotations, assigned suitable rotations and offsets to each of the Agents) that are used by the automatic planning function.
How are rotations applied?
The date from which we want to apply rotations minus the start date of the year in weeks. Add the agent’s rotation start offset. Establish module after integer division by the rotation duration. The result indicates which rotation cycle week will be applied.
Example 1: Apply rotations from 1 January 2018 - 1 January 2018 = 0 weeks. The rotation start offset is 1. 0 + 1 = 1. 1% 3 = 1. Therefore, the 1st week of the rotation cycle will be applied.
Example 2: Apply rotations from 12 August 2019 - 1 January 2018 = 84 weeks. The rotation start offset is 2. 84 + 2 = 86. 86% 3 = 2. Therefore, the 2nd week of the rotation cycle will be applied.
Example 3: Apply rotations from 6 April 2020 - 1 January 2018 = 118 weeks. The rotation start offset is 11. 118 +11 = 129. 129% 3 = 0. Therefore, the 1st week of the rotation cycle will be applied.
Once you have completed these initial tasks, you can run automatic planning. This means that the system will apply the rotation and the offset selected for each agent in the plan throughout the entire plan period.
Same as with any other methods of change, the only possible way to change the actual plan is to create an alternative plan that will apply the rotations.
Therefore, first open the actual plan editor.
Check the plan members (the persons for whom you want to create a plan). You can also use a quick filter.

Important
Plan members cannot be added or removed once a plan is created.
Click on the Apply rotations button.
Select an appropriate plan title and period.
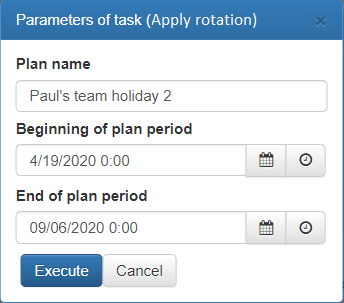
Important
The plan period cannot be changed once a plan is created.
The operation will result in a new shift editor window for the selected persons and period.
Same as any other plan, you need to validate the draft plan and submit it for approval.
On-call shift planning
If your staff serve on-call shifts, then instead of manual planning, you can use a tool for the automatic planning of on-call shifts.
Important
An algorithm for on-call shifts is programmed on the client’s requirements. For this reason, it cannot be described here in detail.
The procedure is (as always) based on creating an alternative plan in which on-call shifts are applied.
Therefore, first open the actual plan editor.
Check the plan members (the persons for whom you want to create a plan). You can also use a quick filter.

Important
Plan members cannot be added or removed once a plan is created.
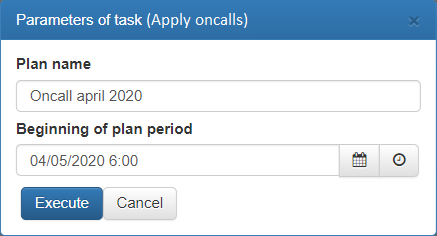
Click on the Apply on-call shifts button.

Select an appropriate plan title and period.
Important
The plan period cannot be changed once a plan is created.
The operation will result in a new alternative plan for the selected persons and period, which will be opened in another browser window.
On-call shifts, same as other activities, can be adjusted manually.
Same as any other plan, you need to validate the draft plan and submit it for approval.
Workplace planning
Another common contact center challenge is to plan a suitable workplaces for agents. If you have properly configured workplaces and locations in FrontStage Admin, WFM can help to plan a workplaces automatically.
Workplace information
Assigned workplaces are part of slot which is displayed in shift viewer or editor
in slot tooltip [4]
on the Info tab in Workplace [3]

Workplace preference
Open agent’s profile in the visual editor and then Seating tab. You will see a list of all the workplaces and their possible settings for particular agent.
The crutial value for WFM is Preference. Possible values:
If the range is 1 to 3, then 1 - most likely to be occupied, 3 - least likely to be occupied
The value can also be X(
NULL) - the lowest value of the range, but occupation of the workplace is still possibleThe selection range is set according to
AgentAdminSeatingPreferenceRange
Note
Algorithm tries to continue assigning current workplace to minimize agent’s moving during the shift.
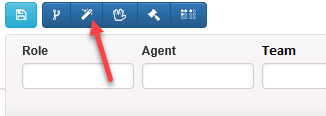
Automatic workplace planning
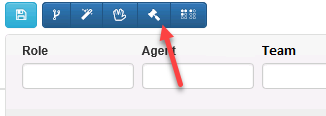
To find out and assign suitable workplaces do the following steps:
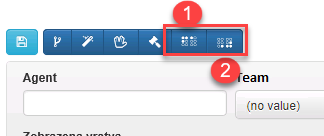
Open actual plan and choose workplace planning button [1].
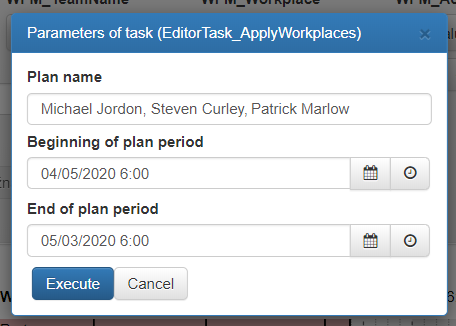
In a dialog change period of workplace plan and submit with Execute button.
During executing you can notice “progress dots” in upper part of a window.

Note
No window or message is displayed even if no suitable workplace found. You can review planned workplaces manually.
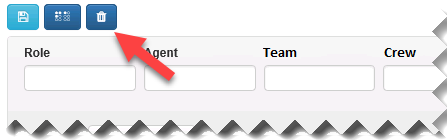
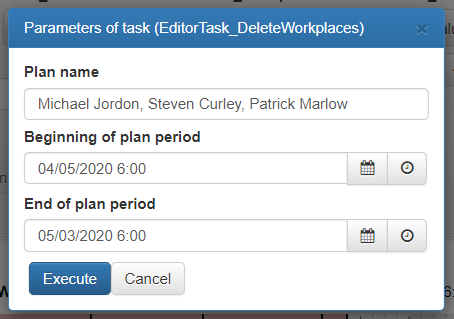
Bulk deletion of planned workplaces
Actual plan shift editor also offers deleting existing assigned workplaces.
Open actual plan and press workplace delete button [2].
In popup dialog change workplace plan period and submit with Execute button.
During executing you can notice “progress dots” in upper part of a window.
Note
No window or message follows. The deleted workplace needs to be checked manually.
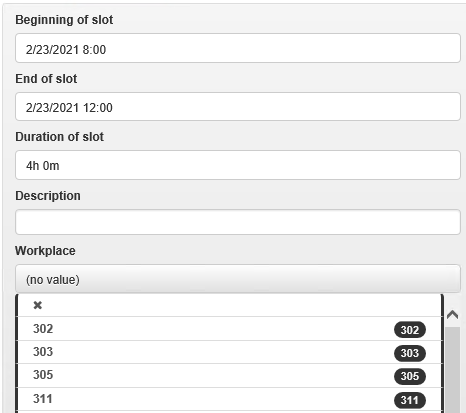
Changing and canceling workplace assignment to specific slots
Select any slot that you want to check or change and manually assign a workplace.
You can change this using the :guilabel: Workplaces drop-down list on the Info tab.
The list only offers workplaces that are available at the given slot time.
By setting
(no value)you will unassign the workplace.
Save changes by pressing
 in the editor header.
During executing you can notice “progress dots” in upper part of a window.
Note
No window or message follows. The workplace change or cancellation needs to be checked manually.