Contacts import/export
The visual editor for importing and exporting contacts is a tool for the supervisor (or admin) to work with contacts in bulk to send out campaigns, etc
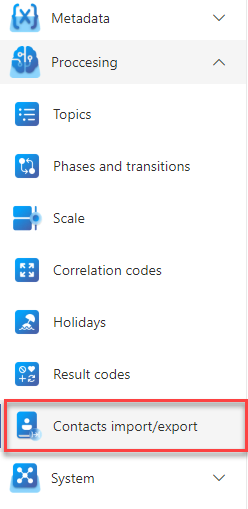
The editor can be found in the FrontStage administration, .
The running editor displays a list of the imports performed. To use it, you must have the EditContactImport role.
In the upper right corner there are buttons for interacting with the records:
Create contact import - displays a popup window to create an import
Delete contact import - deletes the marked import record in the list
Export - displays a popup window for creating an export
Importing contacts
To create an import, press Create contact import in the header. A window will appear where you enter the import parameters.
Encoding - encoding type (character set)
Delimiter - character that will be taken as a column separator in the context, for csv the semicolon is typical
Contact model - contact model for the import, determines the column structure and the need for some information in the input file, available models depend on your installation
Phone Book - if selected, contacts are imported into it
File path - path to the local import file
Download CSV template - the button appears after selecting the contact model, you can use it to download the template where the columns of the model are visible and the necessity of their filling is described, you can use the button when importing the model for the first time, then you can import your already filled file
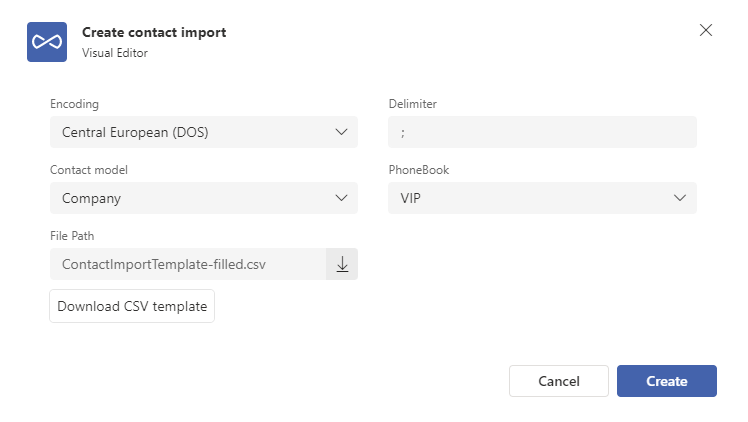
Once the values are filled in, press Create to immediately start the import and create a record of this action that will be visible in the list. You will know the result of the action from the import form.
Import template
When you press Download CSV template, a file containing 2 lines is downloaded to your computer:
the header contains the column names of the model
the second line tells us whether the entry for the selected contact model is mandatory or optional
“Required” = have to be filled in
“Optional” = not mandatory to be filled in

Even if you did not fill in the field, the blank space must be separated by the selected separator character. The system assumes a fixed number of columns, according to the model, and failure to do so will cause the import to fail.
Example of filling “Optional” records when items Number2 - Number9 are not filled:

Comparison of contacts on import
For comparing the existence in the system, the ContactId and ExternalKey items are used. If at least one of them is filled in, it is compared with the existing ones in the system and if it matches, the record is updated. If neither is filled in or there is no match, the entire row is created as a new record.
Exporting contacts
To create an export, press Export in the header. A window will pop up where you enter the export parameters.
Contact model - specifies the columns that will be available for export
Phone Book - if selected, only contacts belonging to this list are exported
Column selection - from the model you can select what columns you need in your file (supports bulk all/unselect actions)
Export from beginning - creates an export with the parameters set above, appears in the section “Export overview” in the footer
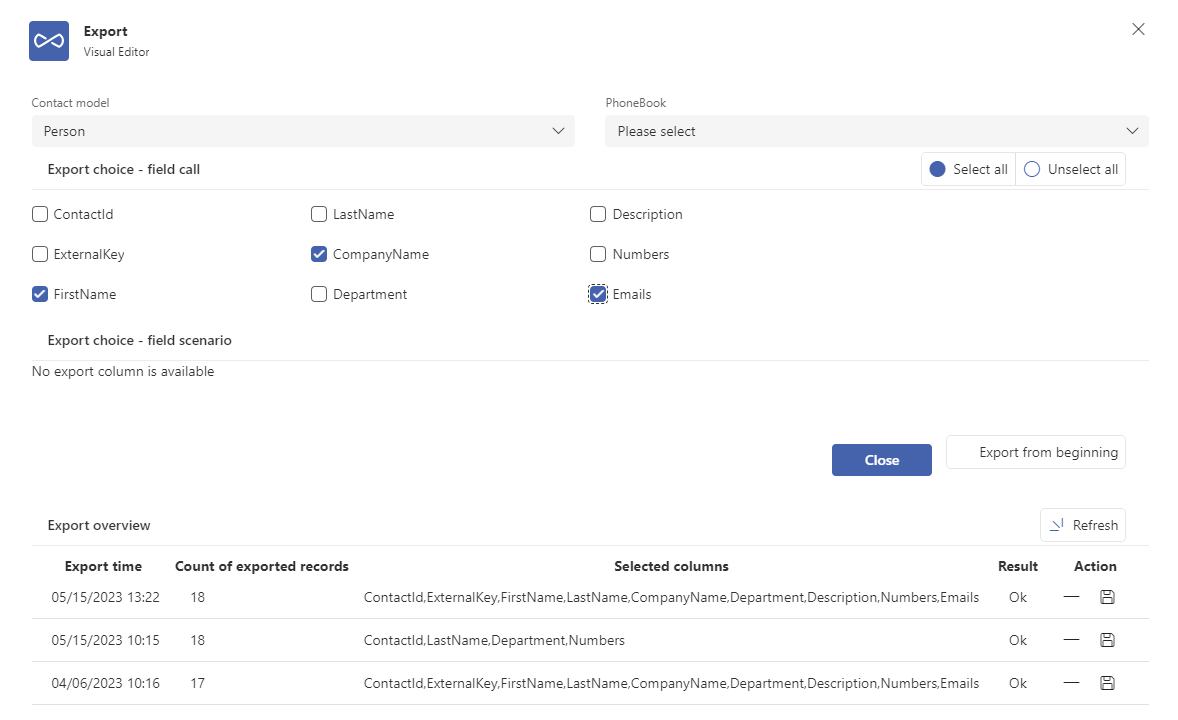
Because of the possible higher load on the system, the exports are not executed immediately, but the system evaluates when it has free resources to process the export. The section ” Export overview” shows both the exports that have already been processed and those that are waiting for it. From this section you can then download the export or delete it from the system. Both actions are available in the Action column of the given record.
