Occupancy
The visual occupancy editor is a tool for the supervisor (or admin) to create and edit capacity rules that determine the distribution of communication channels to the agent.
The editor can be found in FrontStage administration, section . You need the EditBusyCondition role.
The running editor displays a list of all capacity rules.
In the upper right corner there are buttons for interacting with the records:
Create busy condition - displays a popup window to create the rule
Delete busy condition - deletes the marked record in the list
Save changes
Press Create busy condition to open a popup window where you enter the name of the rule and by confirming it you go to its form.
The Detail tab
ID - system generated GUID
Name - you have filled it in before, editable
The special graphic table below these items is the main element of the capacity setting. It tells what is the level of busyness of a given person when handling a certain channel and whether or not he can handle other communication channels at that moment.
The logic of reading the table is by columns, i.e. if there is “PbxIn” in the column header, we read below it what is the busyness in case of an incoming call.
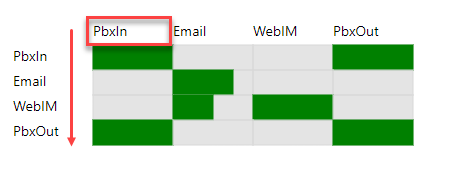
In the example you can see that if the agent is handling an incoming call, any call will keep him 100% busy. This is indicated by the whole colored cell, where we take the whole cell as fully busy. In the example above, the busy shift is in 25% increments, but this is adjustable, so it may be different for your installation.
It can be confusing that for the channel “PbxIn” the occupancy for “PbxOut” is also filled. This is to make it clear to the system that only one call can be handled by the agent while a call is in progress and that no outgoing call is offered. Note that the last column for “PbxOut” is set anaglogically.
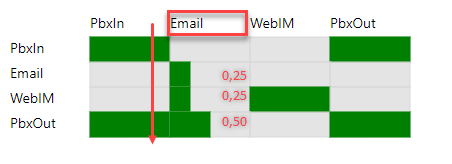
The next example shows that in the case of handling the channel “Email”, the agent is only 25% busy, so he has the capacity to handle up to 4 emails at once because we assume that if 1 email is 25% busy, then 4 emails are 100%. As you can see from the example, it can be a combination of multiple channels, because “WebIM” and “PbxOut” options are included, so, for example, he can handle one outgoing call in addition to two emails because the assumption is that 2 emails are 50% and one outgoing call is 50%, i.e. 100% busy.
Using this style, set the combinations for all channels. The table is set by moving the cursor over the desired cell and pressing the right mouse button to increment the value. To decrease the value, hold down the Alt key and press the right mouse button.
Note
You can set the occupancy step using the BusyConditionOffsetNumber conf. parameter.
Occupancy tab
This is a numeric interpretation of the previous table setup, where you see the same table at the top, but represented in numeric values.
At the lower part, you can select a specific channel, where you will see the combinational possibilities of the selected setting in numbers, according to the logic mentioned above. This is an overview of all possible channel distributions for a given capacity rule. Green lines indicate realistic occupancy, red lines no longer possible ones.
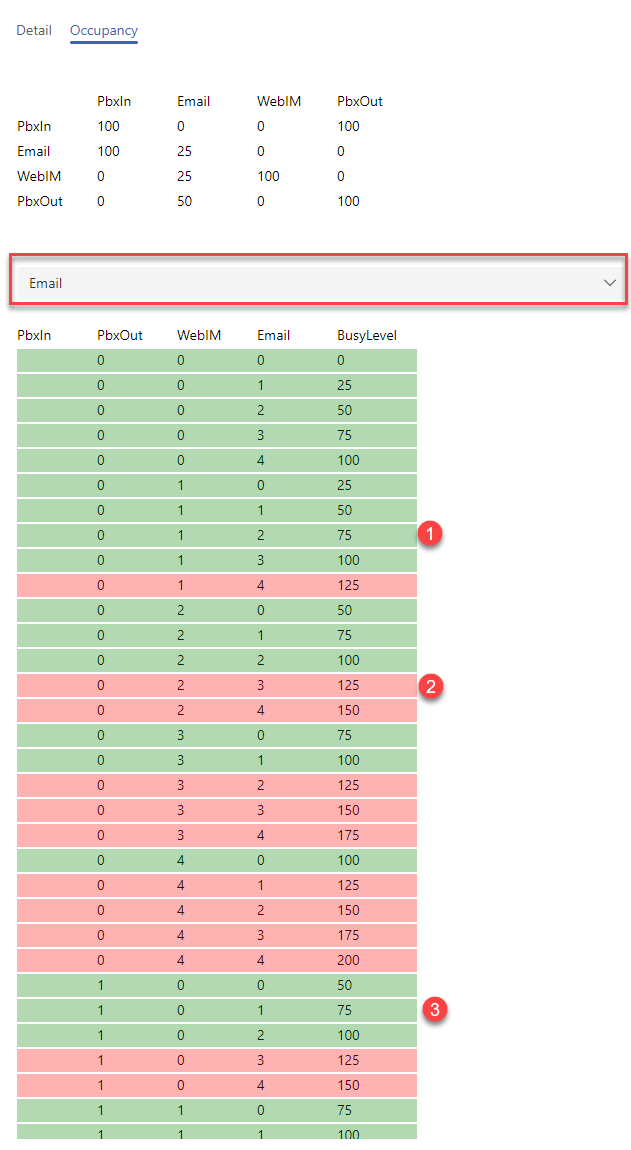
[1] - a combination of one email and two chats will be fine
[2] - combination of two chats and three emails will not be possible
[3] - a combination of one outgoing call and an email will be fine